When I notice excessive scratching or head shaking, it’s time to act. The first step involves a thorough examination of the ears. Look for dark debris resembling coffee grounds, which indicates the presence of these tiny intruders. Regular checks can help catch the issue early, preventing further discomfort.
Using a gentle ear cleaner specifically designed for my kind is crucial. Apply a few drops into each ear, then gently massage the base to dislodge any debris. This not only helps in cleaning but also soothes irritation. It’s essential to follow up with a vet-recommended medication to eliminate the infestation completely.
Maintaining a clean environment is key. Regularly wash bedding and vacuum areas where I spend time to reduce the risk of re-infestation. If other furry friends are around, ensure they get checked as well, since these critters can easily spread from one pet to another. My human should keep an eye on everyone’s ears to catch any signs early.
After treatment, monitoring my ears for any signs of irritation or recurring issues is vital. A follow-up with the veterinarian ensures that everything is on track and that I’m back to my playful self in no time.
Tackling Ear Pests
I recommend getting a specialized cleaning solution designed for ear issues. Apply a few drops to the affected areas, massaging the base of the ears gently to help dislodge debris. It’s important to allow the solution to sit for a short period before wiping it away.
Regularly check the ears for signs of irritation or infection. Look for redness, swelling, or discharge. If you notice any concerning symptoms, consult a veterinarian for further evaluation and treatment options.
Consider a topical treatment that targets these nuisances. Many products are available over the counter, but always confirm they are suitable for my kind before use. Follow the instructions closely to ensure proper application.
Be sure to keep the environment clean. Wash bedding and toys frequently to minimize reinfestation. Regular grooming helps maintain overall hygiene and can assist in detecting any recurrence of these unwelcome guests.
Lastly, monitor my behavior. If I seem excessively scratching or shaking my head, it may indicate persistent irritation. Prompt attention to such signs can prevent complications.
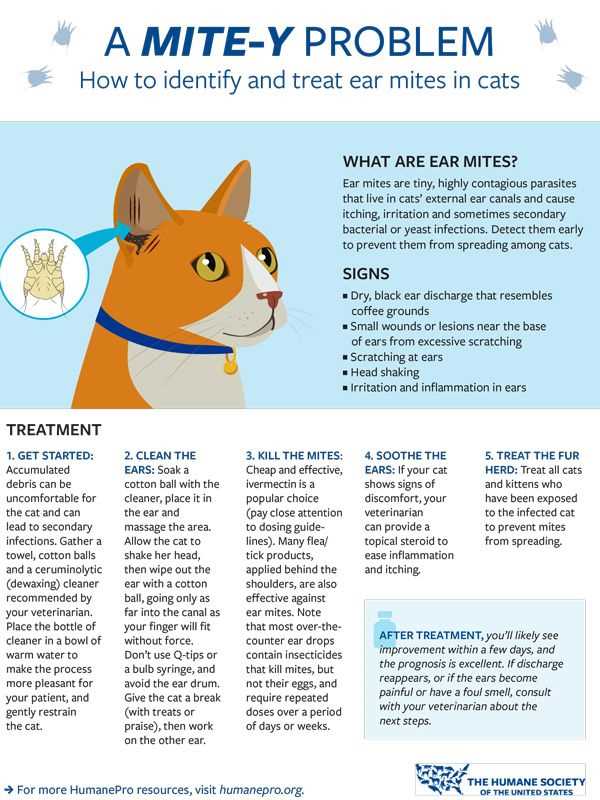
Identifying Symptoms of Ear Mites in Cats
First sign to watch for is excessive scratching around the head and ears. If I’m constantly pawing at my ears, it’s a clear indication something’s not right.
Another noticeable symptom is the presence of dark, crumbly debris in the ear canal. This material can resemble coffee grounds and is often a telltale sign of these parasites.
Pay attention to any unusual odors coming from the ears. A foul smell can suggest an infection, which may accompany the infestation.
Behavior changes can also signal trouble. If I’m more irritable, restless, or hiding more than usual, it might mean discomfort from irritation.
- Head shaking or tilting
- Inflammation or redness in the ear area
- Loss of balance or coordination
If you notice any combination of these symptoms, it’s wise to consult a veterinarian for proper diagnosis and care. For a more comprehensive approach to overall health, consider checking out the best liquid wormer for cats.
Confirming the Presence of Ear Mites
If you’re suspicious about those tiny intruders, here’s what I recommend. First, observe closely for signs. If my ears are shaking or if I see excessive scratching, that’s a red flag.
Direct Inspection
Gently examine the ears. Lift the ear flap and look for:
- Dark brown or black debris resembling coffee grounds.
- Redness or inflammation in the ear canal.
- Unpleasant odor emanating from the ear.
Behavioral Changes
Notice any unusual behaviors, such as:
- Increased irritation or agitation.
- Shaking of the head frequently.
- Loss of balance or coordination.
For confirmation, a visit to the vet is essential. They’ll inspect the ears with a microscope to identify those pesky pests accurately. Quick action is key!
Choosing the Right Treatment Options for Ear Mites
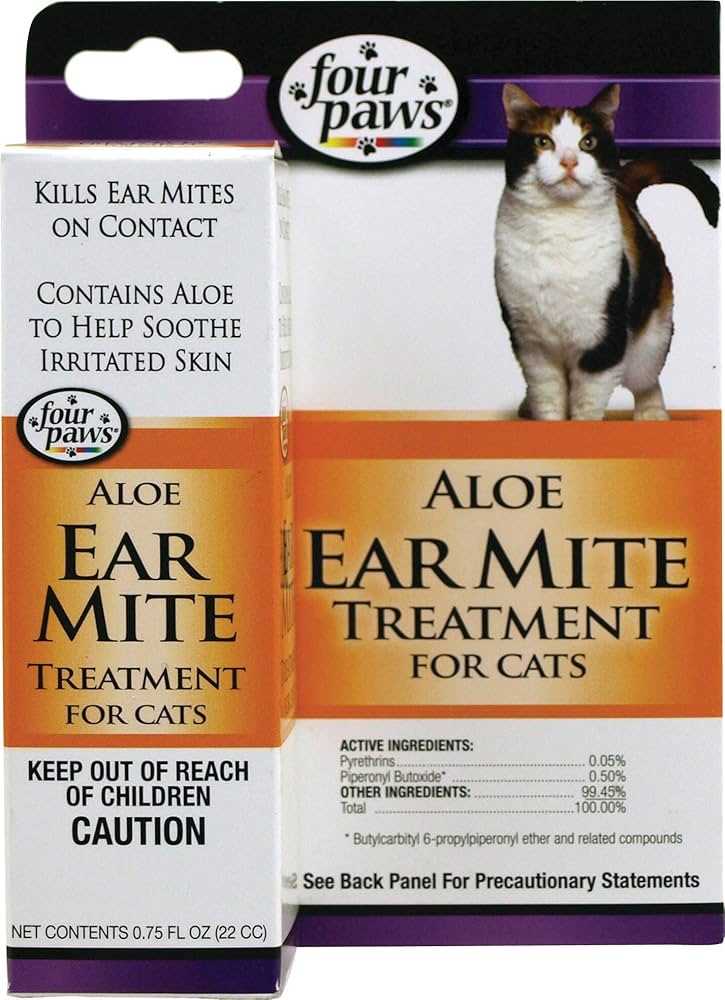
After confirming the presence of these annoying parasites, it’s crucial to select an appropriate remedy. Options include both over-the-counter and prescription solutions. Topical treatments like drops and ointments are commonly used, targeting the affected areas directly. Some of these products contain ingredients that kill the parasites on contact.
For severe infestations, a veterinarian may recommend systemic medications, which work throughout the entire body. These can be in the form of pills or injections and may provide quicker relief compared to topical products. Always follow the dosage instructions carefully to avoid complications.
Natural Remedies
Natural solutions may also be effective. Ingredients like olive oil or mineral oil can suffocate the mites, making them a popular choice among pet owners looking for gentler alternatives. However, while these methods can provide relief, they might not eliminate the problem entirely, especially in advanced cases.
Consultation and Follow-Up
Consulting a veterinarian is often the best path. They can provide tailored advice based on individual needs and the severity of the situation. After starting any treatment, a follow-up visit is essential to ensure the parasites are gone and to prevent future infestations.
Education is key. Knowing more about parasite prevention and treatment options can help in keeping your furry friend healthy. For additional insights on pet care, check out this interesting article on whether do electric dog fences work in snow.
Administering Ear Mite Treatment Safely
Before starting any remedy, ensure the environment is calm. I prefer a quiet room where I feel safe. Hold me gently but securely; a soft touch helps. It’s important to have everything ready: the treatment solution, cotton balls, and treats for positive reinforcement.
Applying the Solution
Follow the instructions on the product carefully. Use a dropper to place the recommended amount in my ear canal. Avoid overfilling, as it can lead to discomfort. After applying, massage the base of my ear to help distribute the liquid. This feels good and ensures the solution reaches the affected areas.
Cleaning and Aftercare
Use a clean cotton ball to wipe away any excess treatment and debris. This helps prevent irritation. Offer a tasty treat afterward; this associates the process with something pleasant. Monitor for any signs of discomfort or adverse reactions. If anything seems off, consult a veterinarian immediately.
Cleaning Your Feline’s Ears During Treatment
Use a vet-approved cleaner specifically formulated for this purpose. Avoid cotton swabs; they can push debris further in. Instead, apply the solution directly into the ear canal according to the instructions on the bottle.
Gently massage the base of the ear for a few seconds to help loosen accumulated dirt and wax. Allow your furry friend to shake their head afterward; this action aids in dislodging particles. Be prepared for some mess; laying down a towel can help keep the area clean.
After the initial cleaning, use a soft, damp cloth or cotton ball to wipe away any excess fluid and debris from the outer ear. Ensure that no moisture remains, as this can lead to further irritation or infections.
Repeat this process every few days during the treatment period, or as directed by your veterinarian. Regular maintenance will contribute to your companion’s comfort and facilitate the effectiveness of the prescribed remedies.
| Step | Description |
|---|---|
| 1 | Apply the cleaner into the ear canal. |
| 2 | Gently massage the ear base. |
| 3 | Allow shaking to dislodge debris. |
| 4 | Wipe outer ear with a soft cloth. |
| 5 | Repeat every few days. |
Preventing Future Infestations
Regularly inspect my ears and those of my furry friends for any signs of discomfort or irritation. Keeping an eye on changes can help catch issues early.
Maintain a clean living environment by vacuuming and washing bedding frequently. This minimizes the chances of unwanted guests lurking around.
Limit contact with other animals known to have these nuisances. If a friend’s pet is affected, it’s best to stay away until they’ve resolved the problem.
Establish a routine for ear cleaning using vet-approved solutions. Keeping the ears clean not only enhances comfort but also discourages potential infestations.
Ensure that all pets in the household receive regular veterinary check-ups. This proactive approach helps to identify and address any health concerns before they escalate.
Avoid overcrowded spaces or areas where animals congregate. These are breeding grounds for many parasites, including the tiny invaders.
Consider using preventative treatments as recommended by my veterinarian. These can provide additional protection against future outbreaks.
Stay informed about common signs of these nuisances. Recognizing issues early can lead to quicker solutions and a happier, healthier life for everyone involved.
When to Consult a Veterinarian for Ear Mites
If you notice persistent scratching, head shaking, or unusual discharge from the ears, it’s time to seek professional help. An examination by a veterinarian can rule out other potential issues and confirm the infestation.
Signs of severe irritation, such as bleeding or swelling in the ear area, warrant immediate attention. If your furry friend exhibits signs of distress or discomfort that seem beyond normal behavior, don’t hesitate to schedule a visit.
Complications to Watch For
Watch for symptoms such as lethargy or loss of appetite, which may indicate a more serious condition. If your companion develops secondary infections due to excessive scratching, medical intervention becomes necessary.
Follow-Up Care
After initiating treatment, monitoring progress is crucial. If symptoms persist or worsen, contacting a veterinarian ensures that your pet receives the appropriate care and adjustments to the treatment plan.
Ignoring ongoing issues can lead to chronic problems, so staying proactive is key to maintaining your pet’s well-being.
FAQ:
What are the signs that my cat has ear mites?
Common signs of ear mites in cats include excessive scratching of the ears, shaking their head frequently, and a strong odor coming from the ears. You might also notice dark, crumbly debris resembling coffee grounds in the ear canal. If your cat seems more irritable or is rubbing their head against furniture, these could also be indicators of an ear mite infestation.
How can I safely treat my cat for ear mites at home?
To treat ear mites at home, you can start by cleaning your cat’s ears gently with a cotton ball soaked in a vet-approved ear cleaner. After cleaning, apply a topical treatment specifically formulated for ear mites, which you can purchase at a pet store or from your veterinarian. It’s important to follow the instructions carefully and continue treatment for the full duration recommended, usually around two to four weeks, to ensure the mites are completely eliminated. Always consult your veterinarian before starting any treatment to ensure it’s safe for your cat.
Are there any risks associated with treating ear mites without veterinary guidance?
Treating ear mites without veterinary guidance can pose several risks. Firstly, incorrect treatment may not effectively eliminate the mites, leading to a prolonged infestation and potential complications, such as ear infections. Additionally, some over-the-counter treatments can cause irritation or allergic reactions. Without a veterinarian’s assessment, it can also be challenging to differentiate ear mites from other issues, such as allergies or bacterial infections, which may require different treatments. It’s always safest to consult with a veterinarian to get the most appropriate care for your cat.