


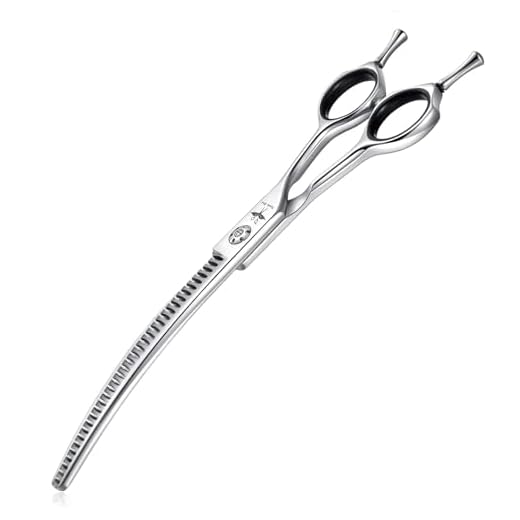
First things first, grab a pair of sharp scissors or a small pair of nail clippers. Make sure they are clean and ready for action. Keeping everything tidy is key to a smooth operation.
Next, hold my paw gently but firmly. It’s important to be calm and relaxed during this process. If I’m wiggling too much, it’s a good idea to have a buddy help you out. A little treat can also make me more cooperative!
Carefully locate the base of the cover. There should be a small gap between the cover and my nail. This is where you want to cut. Snip just above the nail without cutting into my precious toe. If you’re unsure, take your time and double-check!
Once you’ve successfully taken off a few, make sure to reward me with some love or a tasty snack. This makes the whole experience much more enjoyable for both of us!
Removing Those Annoying Tips
It’s simple to tackle those plastic coverings on my paws. First, make sure you have a calm environment. A quiet space helps avoid any sudden movements. Gather your supplies: a pair of blunt-tipped scissors or a nail clipper. These tools will assist in the process.
Steps to Follow
- Gently hold my paw and examine the tip. Look for the joint where the covering is attached.
- Slide the scissors or clipper under the edge of the covering. Be careful not to touch my actual claw.
- Snip or pinch carefully, ensuring you don’t apply too much pressure. The covering should come off easily.
- Check for any residue. If there’s any left behind, gently peel it away.
Post-Removal Care
After finishing, reward me with a treat or some petting. This makes the experience positive! If you notice any discomfort or irritation, consider consulting a vet.
And while we’re on the topic of odd cat behaviors, have you ever wondered why dont cats like aluminum foil? It’s a mystery worth exploring!
Choosing the Right Tools for Removal
For this job, I recommend using a pair of blunt-nosed scissors or a specialized claw clipper. These tools help prevent any accidental pinching or injury during the process.
Keep a small bowl of warm, soapy water nearby. This can be used to soak the tips after the removal, ensuring any residue is cleaned off quickly and easily.
A pair of tweezers can be handy if you encounter stubborn pieces that refuse to budge. They provide a better grip, allowing for more precision and control.
Consider having a calm environment. A soft blanket or a cozy spot can help keep the mood relaxed while you work.
Lastly, a treat or favorite toy can distract and reward for cooperation. This makes the whole experience more pleasant for both of us.
Step-by-Step Guide to Safely Remove Claw Caps
First, find a quiet space where I can relax. Hold me gently, ensuring I feel secure and comfortable. A calm atmosphere makes this process smoother.
Next, examine each soft covering carefully. Check for any that may have loosened or are already partially detached. This will help you identify which ones need attention.
Using your chosen tool, gently grasp the base of the covering. Avoid pulling on my fur. Slowly slide the tool along the edge, applying a light pressure to loosen the grip without causing discomfort.
Once the covering starts to come off, continue to apply a gentle, steady motion. If there’s resistance, pause and reassess. It’s better to take your time than to rush.
After successfully removing a cover, check my paws for any remaining adhesive or residue. If you notice anything sticky, use a damp cloth to clean the area gently.
Finally, praise me with a treat or some affection. This positive reinforcement makes future maintenance easier and keeps our bond strong.
Handling Your Companion During the Removal Process
Stay calm and gentle throughout the procedure. I appreciate a soothing voice and soft petting. It helps ease my nerves, making it easier for both of us. Begin by familiarizing your friend with the environment. Allow some time for exploration before proceeding with any tasks.
Creating a Comfortable Space
Pick a quiet area where distractions are minimal. A cozy blanket or bed can make a significant difference. If I feel secure, I’m more likely to cooperate. Use treats to create positive associations. Offer a small reward after every successful step to maintain a relaxed atmosphere.
Maintaining Control
Gently hold my paw but avoid applying too much pressure, which can cause discomfort. A light grip ensures I don’t squirm away. If I resist, take a break. Patience is key. If all else fails, you can read about can cats eat mulberries while waiting for me to calm down. This can be a fun distraction for both of us!
Post-Removal Care for Your Feline Paws
After those pesky coverings are off, focus on keeping my paws healthy and happy. First, check for any signs of irritation or injury. If you notice redness or swelling, it’s best to consult a vet.
Maintain cleanliness by gently wiping my paws with a damp cloth. This helps remove any debris or residue from the adhesive. Make sure to dry them thoroughly to prevent moisture-related issues.
Consider applying a paw balm to keep my pads moisturized, especially if they seem dry or cracked. Choose a cat-safe product, and a little goes a long way. Massage it gently into my paws to soothe and protect them.
Monitor my behavior closely. If I show signs of discomfort while walking or grooming, it may be worth a trip to the vet. Regularly check my nails to ensure they are growing properly without those covers.
Finally, provide a soft surface for me to rest on. Avoid rough or abrasive materials that could irritate my sensitive paw pads during this recovery period. Keeping my environment comfortable will help me bounce back quickly!
FAQ:
What are the best methods for safely removing cat claw caps?
To safely remove cat claw caps, you can follow these steps: First, gather your supplies, including a pair of scissors or a claw clipper and a towel. Gently wrap your cat in a towel to keep them calm and secure. Then, examine each claw cap carefully to find where they attach to the nail. Using the scissors or clipper, carefully cut the cap at the base, taking care not to hurt your cat. It’s important to remain calm and patient throughout the process, as your cat may be anxious. If you encounter any difficulties, consider seeking help from a veterinarian or a professional groomer to ensure a stress-free experience for you and your pet.
How often should cat claw caps be replaced, and what signs indicate they need to be removed?
Cat claw caps typically need to be replaced every 4 to 6 weeks, depending on your cat’s activity level and how quickly their nails grow. Signs that the claw caps need to be removed include if they become loose or start to fall off on their own, if your cat seems to be overly bothered by them, or if you notice any signs of irritation or infection around the nail area. It’s essential to keep an eye on your cat’s claws to ensure they remain healthy and that the caps do not cause any discomfort. Regular checks can help you stay on top of any necessary replacements.


