


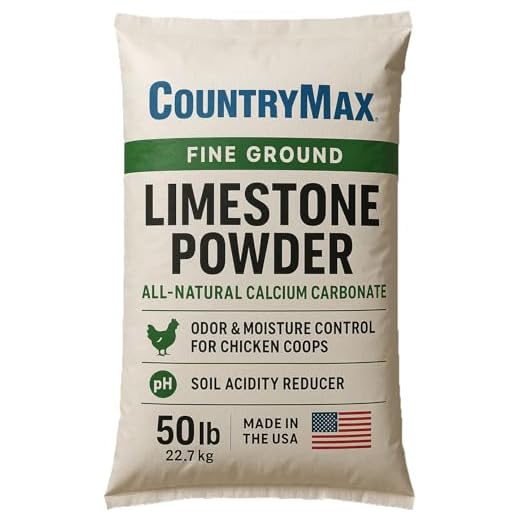
For a clean and safe garden environment, consider using lime. It helps in reducing acidity and can effectively combat unwanted residues. Spread a thin layer across the affected area, and give it some time to work its magic.
Another approach is to incorporate a mixture of compost and organic matter. This not only enriches the ground but also aids in breaking down any remnants. Make sure to mix it well into the top layer of the earth.
Utilizing natural enzymatic cleaners can also yield positive results. These products target specific organic materials, breaking them down and eliminating unpleasant odors. Apply according to the directions for optimal outcomes.

Finally, don’t forget about the power of water. Regular irrigation helps dilute any lingering substances, pushing them deeper into the ground where they can decompose naturally. Just ensure the area drains well to avoid waterlogging.
Simple Steps to Tackle Waste in Your Garden
Mix equal parts of baking soda and water to create a paste. Apply this mixture to the affected area to neutralize odors. Let it sit for a few hours before rinsing with clean water.
Natural Remedies
- Sprinkle diatomaceous earth over the area. This substance helps absorb moisture and odors.
- Add activated charcoal to the soil. It’s excellent for odor control and helps improve soil quality.
- Use vinegar diluted with water as a spray. This can help eliminate lingering smells effectively.
Preventive Measures
- Regularly clean the litter box to minimize contamination.
- Consider training to reduce outdoor bathroom habits. Check out resources on how to stop play aggression in cats.
Identifying Contaminated Areas in Your Garden
Look for distinct signs such as unusual odors or visible droppings. The presence of these indicators can help you pinpoint affected spots. Be vigilant after rain or watering, as these conditions can bring waste closer to the surface.
Visual Clues
Inspect the garden for irregularities in plant growth. Yellowing leaves or stunted plants might suggest compromised ground conditions. Areas where the grass appears worn or discolored can also signal contamination.
Testing the Ground
Consider using a simple pH test kit to analyze the earth’s chemistry. An abnormal pH level can indicate the presence of harmful substances. Alternatively, take a small sample for laboratory testing to ensure safety before planting or consuming any crops.
Choosing the Right Soil Amendments for Neutralization
To effectively manage contamination in the garden, using the right amendments is crucial. Organic matter such as compost and well-rotted manure can significantly enhance microbial activity, aiding in breakdown processes. Aim for a mix that is rich in nitrogen, which helps to accelerate decomposition.
Considerations for pH Adjustment
Testing the acidity or alkalinity of the earth is a priority. If the pH is low, adding lime will help raise it, creating a less hospitable environment for harmful pathogens. Conversely, if the pH is high, sulfur can help lower it, balancing the nutrient profile.
Beneficial Microbes and Enzymes
Incorporating products that contain beneficial microbes can boost soil health. Look for biofertilizers or mycorrhizal fungi that promote nutrient uptake and enhance the resilience of the ecosystem. Enzymatic treatments can also break down remaining waste components, further aiding restoration efforts.
Step-by-Step Cleaning Process for Affected Soil
First, wear gloves to protect your paws. Gather necessary tools: shovel, trowel, and a bucket. Remove visible waste carefully, placing it in the bucket. Dispose of it properly in a sealed bag.
Next, aerate the area. Use a garden fork or trowel to turn the top few inches of the ground. This helps in breaking up compacted dirt and improves air circulation.
After aeration, apply a generous amount of lime or other alkaline materials. This helps adjust pH levels. Follow the recommended application rates based on the size of the contaminated area. Mix thoroughly into the soil with the trowel.
Water the area lightly after applying amendments. This encourages the materials to integrate into the ground. Avoid overwatering, as it may lead to runoff.
Wait for a few weeks to observe changes. Monitor the site for any lingering odors or signs of contamination. If necessary, repeat the process with additional amendments.
Finally, consider planting grass or other plants known for their cleansing properties. This helps restore health to the affected area over time.
| Step | Action |
|---|---|
| 1 | Wear gloves and gather tools |
| 2 | Remove visible waste |
| 3 | Aerate the area |
| 4 | Apply lime or amendments |
| 5 | Water lightly |
| 6 | Monitor for changes |
| 7 | Consider planting cleansing vegetation |
Long-Term Prevention Strategies for Cat Feces Issues
To keep unwanted droppings out of my territory, I recommend using barriers like fences or netting. This prevents access to garden areas where I might roam or dig. Make sure these barriers are tall enough and buried a bit underground to stop any sneaky intrusions.
Consider planting strong-smelling herbs or flowers, such as lavender or rosemary, around the garden’s perimeter. These scents act as natural deterrents, making the area less inviting for other felines.
Regular Maintenance
Establish a routine to check your outdoor space. Regular inspections allow quick identification of any messes and enable timely action. Maintaining cleanliness not only keeps my domain tidy but also discourages future visits.
Community Engagement
Engaging with neighbors about their pets can be helpful. Sharing concerns might encourage them to keep their furry friends indoors or provide a designated area for them. Collaboration can significantly reduce unwanted visits and ensure a harmonious environment for everyone.
FAQ:
What are the best methods to neutralize cat feces in soil?
There are several effective methods to neutralize cat feces in soil. One common approach is to use lime, which raises the pH level and can help break down harmful pathogens. Another option is to apply compost or organic matter, as these can enhance soil health and promote microbial activity that decomposes waste. Additionally, using a commercial enzyme cleaner designed for pet waste can help neutralize odors and pathogens. It’s crucial to apply these solutions evenly and follow up with regular soil testing to ensure the effectiveness of the chosen method.
How can I tell if cat feces has contaminated my garden soil?
Signs of cat feces contamination in garden soil can include a strong odor, visible feces, or unusual plant growth patterns. If you notice your plants are wilting or showing signs of disease, it might indicate underlying soil issues. Testing the soil for pathogens or harmful bacteria can provide confirmation. Home testing kits are available at garden centers and can help you assess the safety of your soil. If in doubt, consider consulting with a local agricultural extension office for assistance.
Is it safe to use my garden after treating it for cat feces?
After treating your garden soil for cat feces, it’s important to wait before using it for planting or any gardening activities. Generally, allowing a period of at least two to four weeks after treatment is advisable. This waiting period gives time for the soil to stabilize and for any harmful pathogens to break down. Always ensure that you follow the manufacturer’s instructions for any products used, and if you’re unsure, consider testing the soil again before planting.
What precautions should I take when cleaning up cat feces from my soil?
When cleaning up cat feces from your soil, wearing gloves is crucial to protect your hands from pathogens. Use a shovel or scoop to remove the waste, and place it in a sealed bag for disposal. After removal, thoroughly wash your hands and any tools used. If you are handling contaminated soil, consider wearing a mask to avoid inhaling dust or spores. It’s also wise to keep pets and children away from the area until it has been treated and deemed safe for use.
For a clean and safe garden environment, consider using lime. It helps in reducing acidity and can effectively combat unwanted residues. Spread a thin layer across the affected area, and give it some time to work its magic.
Another approach is to incorporate a mixture of compost and organic matter. This not only enriches the ground but also aids in breaking down any remnants. Make sure to mix it well into the top layer of the earth.
Utilizing natural enzymatic cleaners can also yield positive results. These products target specific organic materials, breaking them down and eliminating unpleasant odors. Apply according to the directions for optimal outcomes.
Finally, don’t forget about the power of water. Regular irrigation helps dilute any lingering substances, pushing them deeper into the ground where they can decompose naturally. Just ensure the area drains well to avoid waterlogging.
Simple Steps to Tackle Waste in Your Garden
Mix equal parts of baking soda and water to create a paste. Apply this mixture to the affected area to neutralize odors. Let it sit for a few hours before rinsing with clean water.
Natural Remedies
- Sprinkle diatomaceous earth over the area. This substance helps absorb moisture and odors.
- Add activated charcoal to the soil. It’s excellent for odor control and helps improve soil quality.
- Use vinegar diluted with water as a spray. This can help eliminate lingering smells effectively.
Preventive Measures
- Regularly clean the litter box to minimize contamination.
- Consider training to reduce outdoor bathroom habits. Check out resources on how to stop play aggression in cats.
Identifying Contaminated Areas in Your Garden
Look for distinct signs such as unusual odors or visible droppings. The presence of these indicators can help you pinpoint affected spots. Be vigilant after rain or watering, as these conditions can bring waste closer to the surface.
Visual Clues
Inspect the garden for irregularities in plant growth. Yellowing leaves or stunted plants might suggest compromised ground conditions. Areas where the grass appears worn or discolored can also signal contamination.
Testing the Ground
Consider using a simple pH test kit to analyze the earth’s chemistry. An abnormal pH level can indicate the presence of harmful substances. Alternatively, take a small sample for laboratory testing to ensure safety before planting or consuming any crops.
Choosing the Right Soil Amendments for Neutralization
To effectively manage contamination in the garden, using the right amendments is crucial. Organic matter such as compost and well-rotted manure can significantly enhance microbial activity, aiding in breakdown processes. Aim for a mix that is rich in nitrogen, which helps to accelerate decomposition.
Considerations for pH Adjustment
Testing the acidity or alkalinity of the earth is a priority. If the pH is low, adding lime will help raise it, creating a less hospitable environment for harmful pathogens. Conversely, if the pH is high, sulfur can help lower it, balancing the nutrient profile.
Beneficial Microbes and Enzymes
Incorporating products that contain beneficial microbes can boost soil health. Look for biofertilizers or mycorrhizal fungi that promote nutrient uptake and enhance the resilience of the ecosystem. Enzymatic treatments can also break down remaining waste components, further aiding restoration efforts.
Step-by-Step Cleaning Process for Affected Soil
First, wear gloves to protect your paws. Gather necessary tools: shovel, trowel, and a bucket. Remove visible waste carefully, placing it in the bucket. Dispose of it properly in a sealed bag.
Next, aerate the area. Use a garden fork or trowel to turn the top few inches of the ground. This helps in breaking up compacted dirt and improves air circulation.
After aeration, apply a generous amount of lime or other alkaline materials. This helps adjust pH levels. Follow the recommended application rates based on the size of the contaminated area. Mix thoroughly into the soil with the trowel.
Water the area lightly after applying amendments. This encourages the materials to integrate into the ground. Avoid overwatering, as it may lead to runoff.
Wait for a few weeks to observe changes. Monitor the site for any lingering odors or signs of contamination. If necessary, repeat the process with additional amendments.
Finally, consider planting grass or other plants known for their cleansing properties. This helps restore health to the affected area over time.
| Step | Action |
|---|---|
| 1 | Wear gloves and gather tools |
| 2 | Remove visible waste |
| 3 | Aerate the area |
| 4 | Apply lime or amendments |
| 5 | Water lightly |
| 6 | Monitor for changes |
| 7 | Consider planting cleansing vegetation |
Long-Term Prevention Strategies for Cat Feces Issues
To keep unwanted droppings out of my territory, I recommend using barriers like fences or netting. This prevents access to garden areas where I might roam or dig. Make sure these barriers are tall enough and buried a bit underground to stop any sneaky intrusions.
Consider planting strong-smelling herbs or flowers, such as lavender or rosemary, around the garden’s perimeter. These scents act as natural deterrents, making the area less inviting for other felines.
Regular Maintenance
Establish a routine to check your outdoor space. Regular inspections allow quick identification of any messes and enable timely action. Maintaining cleanliness not only keeps my domain tidy but also discourages future visits.
Community Engagement
Engaging with neighbors about their pets can be helpful. Sharing concerns might encourage them to keep their furry friends indoors or provide a designated area for them. Collaboration can significantly reduce unwanted visits and ensure a harmonious environment for everyone.
FAQ:
What are the best methods to neutralize cat feces in soil?
There are several effective methods to neutralize cat feces in soil. One common approach is to use lime, which raises the pH level and can help break down harmful pathogens. Another option is to apply compost or organic matter, as these can enhance soil health and promote microbial activity that decomposes waste. Additionally, using a commercial enzyme cleaner designed for pet waste can help neutralize odors and pathogens. It’s crucial to apply these solutions evenly and follow up with regular soil testing to ensure the effectiveness of the chosen method.
How can I tell if cat feces has contaminated my garden soil?
Signs of cat feces contamination in garden soil can include a strong odor, visible feces, or unusual plant growth patterns. If you notice your plants are wilting or showing signs of disease, it might indicate underlying soil issues. Testing the soil for pathogens or harmful bacteria can provide confirmation. Home testing kits are available at garden centers and can help you assess the safety of your soil. If in doubt, consider consulting with a local agricultural extension office for assistance.
Is it safe to use my garden after treating it for cat feces?
After treating your garden soil for cat feces, it’s important to wait before using it for planting or any gardening activities. Generally, allowing a period of at least two to four weeks after treatment is advisable. This waiting period gives time for the soil to stabilize and for any harmful pathogens to break down. Always ensure that you follow the manufacturer’s instructions for any products used, and if you’re unsure, consider testing the soil again before planting.
What precautions should I take when cleaning up cat feces from my soil?
When cleaning up cat feces from your soil, wearing gloves is crucial to protect your hands from pathogens. Use a shovel or scoop to remove the waste, and place it in a sealed bag for disposal. After removal, thoroughly wash your hands and any tools used. If you are handling contaminated soil, consider wearing a mask to avoid inhaling dust or spores. It’s also wise to keep pets and children away from the area until it has been treated and deemed safe for use.


