


Gather some old newspapers and a bowl of flour mixed with water; these will be the foundation for your feline form. Start tearing the newspapers into strips, about one inch wide, ensuring you have plenty for the task ahead.
Next, shape a basic structure using a balloon or crumpled paper as a base. This will serve as the core of your creation. Use masking tape to secure the elements together, providing a sturdy framework for your art piece.
Dip each newspaper strip into the flour mixture, removing excess paste by running it between your fingers. Layer these strips over your base, smoothing them down to eliminate air bubbles. Apply multiple layers for durability, allowing each layer to dry thoroughly before adding the next.
After the final layer completely dries, pop the balloon or remove the core. Now, you can paint and decorate your creation. Use non-toxic paints for a safe finish and let your imagination guide the design process.
Once everything is dry, display your masterpiece proudly! This project not only recycles materials but also brings out your creativity in a fun and engaging way.
Choosing the Right Materials for Your Feline Craft
I recommend starting with newspapers or old magazines. They tear easily and create a lightweight structure. If you want something sturdier, brown paper bags work well too. Just ensure the sheets are thin enough for easy manipulation.
For the adhesive, a mixture of water and flour is perfect. Just combine equal parts until you get a smooth paste. Alternatively, white glue diluted with water can provide a stronger bond if you prefer.
Consider using a balloon or cardboard as a base. A deflated balloon makes a great rounded shape, while cardboard can be cut and shaped for a more angular design. Secure everything with tape before layering with your chosen materials.
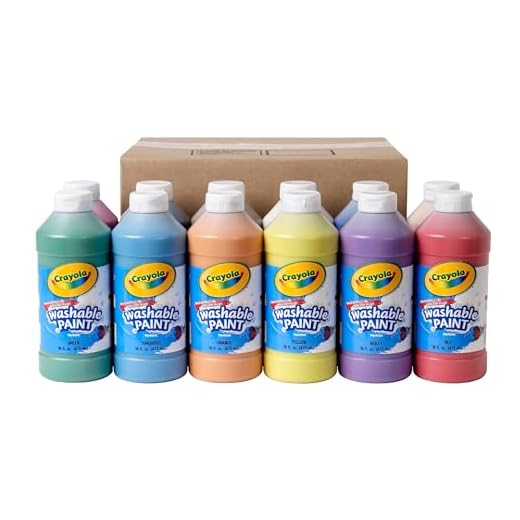
For finishing touches, acrylic paints are ideal. They dry quickly and provide vibrant colors. Look for non-toxic options to keep things safe and fun. Finally, a clear sealant can protect your creation and give it a nice shine.
Step-by-Step Process for Creating the Structure
Begin with a sturdy base. A balloon or wire frame works well. Inflate the balloon to your desired size, securing it tightly. If using wire, shape it into a cat form, ensuring stability.
Prepare the adhesive mixture. Combine equal parts of flour and water to create a smooth paste. This will be the glue that holds everything together.
Cut strips of newspaper or similar material. Aim for pieces that are about 1-2 inches wide. The length can vary; longer strips are useful for covering larger areas.
Dip each strip into the paste, making sure to coat it thoroughly. Remove excess glue by sliding the strip between your fingers. Apply the first layer of strips to your base, overlapping them slightly for strength.
Continue adding layers. Aim for at least three to four layers for a solid structure. Allow each layer to dry completely before adding the next. This can take several hours or overnight.
Once the structure is dry, pop the balloon if used. If you used wire, remove any loose ends or adjust shapes as needed. This stage defines the overall form.
Before painting or decorating, sand any rough areas for a smooth finish. Now your base is ready for the artistic touches. For inspiration or ideas, check out what does the black footed cat eat. This can spark creativity for your final design.
Painting and Decorating Your Finished Creation
Start with a base coat. A simple white or cream acrylic paint works best to cover any imperfections and prepare the surface for decoration. Use a foam brush for smooth application and let it dry completely before moving on.
Choosing Colors
Consider your favorite hues. I love shades of gray, but you might prefer bright colors or pastels. Select colors that resonate with your personality. Use non-toxic, water-based paints for safety.
Adding Details
Once the base coat is dry, use smaller brushes to add features like eyes, whiskers, and patterns. You can create fun designs or even replicate your own fur patterns. For added flair, consider using glitter or metallic paint for accents. Let your creativity shine!
After painting, seal your work with a clear acrylic spray to protect it from scratches and dust. This step is essential if you want to keep your masterpiece looking fresh. For additional inspiration, check out this article about whether do cats like routine to see how different environments can influence your art.
Gather some old newspapers and a bowl of flour mixed with water; these will be the foundation for your feline form. Start tearing the newspapers into strips, about one inch wide, ensuring you have plenty for the task ahead.
Next, shape a basic structure using a balloon or crumpled paper as a base. This will serve as the core of your creation. Use masking tape to secure the elements together, providing a sturdy framework for your art piece.
Dip each newspaper strip into the flour mixture, removing excess paste by running it between your fingers. Layer these strips over your base, smoothing them down to eliminate air bubbles. Apply multiple layers for durability, allowing each layer to dry thoroughly before adding the next.
After the final layer completely dries, pop the balloon or remove the core. Now, you can paint and decorate your creation. Use non-toxic paints for a safe finish and let your imagination guide the design process.
Once everything is dry, display your masterpiece proudly! This project not only recycles materials but also brings out your creativity in a fun and engaging way.
Choosing the Right Materials for Your Feline Craft
I recommend starting with newspapers or old magazines. They tear easily and create a lightweight structure. If you want something sturdier, brown paper bags work well too. Just ensure the sheets are thin enough for easy manipulation.
For the adhesive, a mixture of water and flour is perfect. Just combine equal parts until you get a smooth paste. Alternatively, white glue diluted with water can provide a stronger bond if you prefer.
Consider using a balloon or cardboard as a base. A deflated balloon makes a great rounded shape, while cardboard can be cut and shaped for a more angular design. Secure everything with tape before layering with your chosen materials.
For finishing touches, acrylic paints are ideal. They dry quickly and provide vibrant colors. Look for non-toxic options to keep things safe and fun. Finally, a clear sealant can protect your creation and give it a nice shine.
Step-by-Step Process for Creating the Structure
Begin with a sturdy base. A balloon or wire frame works well. Inflate the balloon to your desired size, securing it tightly. If using wire, shape it into a cat form, ensuring stability.
Prepare the adhesive mixture. Combine equal parts of flour and water to create a smooth paste. This will be the glue that holds everything together.
Cut strips of newspaper or similar material. Aim for pieces that are about 1-2 inches wide. The length can vary; longer strips are useful for covering larger areas.
Dip each strip into the paste, making sure to coat it thoroughly. Remove excess glue by sliding the strip between your fingers. Apply the first layer of strips to your base, overlapping them slightly for strength.
Continue adding layers. Aim for at least three to four layers for a solid structure. Allow each layer to dry completely before adding the next. This can take several hours or overnight.
Once the structure is dry, pop the balloon if used. If you used wire, remove any loose ends or adjust shapes as needed. This stage defines the overall form.
Before painting or decorating, sand any rough areas for a smooth finish. Now your base is ready for the artistic touches. For inspiration or ideas, check out what does the black footed cat eat. This can spark creativity for your final design.
Painting and Decorating Your Finished Creation
Start with a base coat. A simple white or cream acrylic paint works best to cover any imperfections and prepare the surface for decoration. Use a foam brush for smooth application and let it dry completely before moving on.
Choosing Colors
Consider your favorite hues. I love shades of gray, but you might prefer bright colors or pastels. Select colors that resonate with your personality. Use non-toxic, water-based paints for safety.
Adding Details
Once the base coat is dry, use smaller brushes to add features like eyes, whiskers, and patterns. You can create fun designs or even replicate your own fur patterns. For added flair, consider using glitter or metallic paint for accents. Let your creativity shine!
After painting, seal your work with a clear acrylic spray to protect it from scratches and dust. This step is essential if you want to keep your masterpiece looking fresh. For additional inspiration, check out this article about whether do cats like routine to see how different environments can influence your art.


