First, gather your supplies: soft yarn in your favorite color and a pair of needles suitable for your chosen material. Choose a blend that offers warmth and comfort, ensuring it feels nice against delicate fur.
Next, measure your companion’s head circumference. This can be done with a soft measuring tape, wrapping it gently around the largest part of their head. Add a little extra for comfort; it’s crucial that the final piece is snug but not constrictive.
Cast on the required stitches based on the measurement you took. A stretchy cast-on method will help the finished item fit better. Use a simple ribbing technique to create a stretchy band that will hug their head comfortably. This will also add a nice texture to the piece.
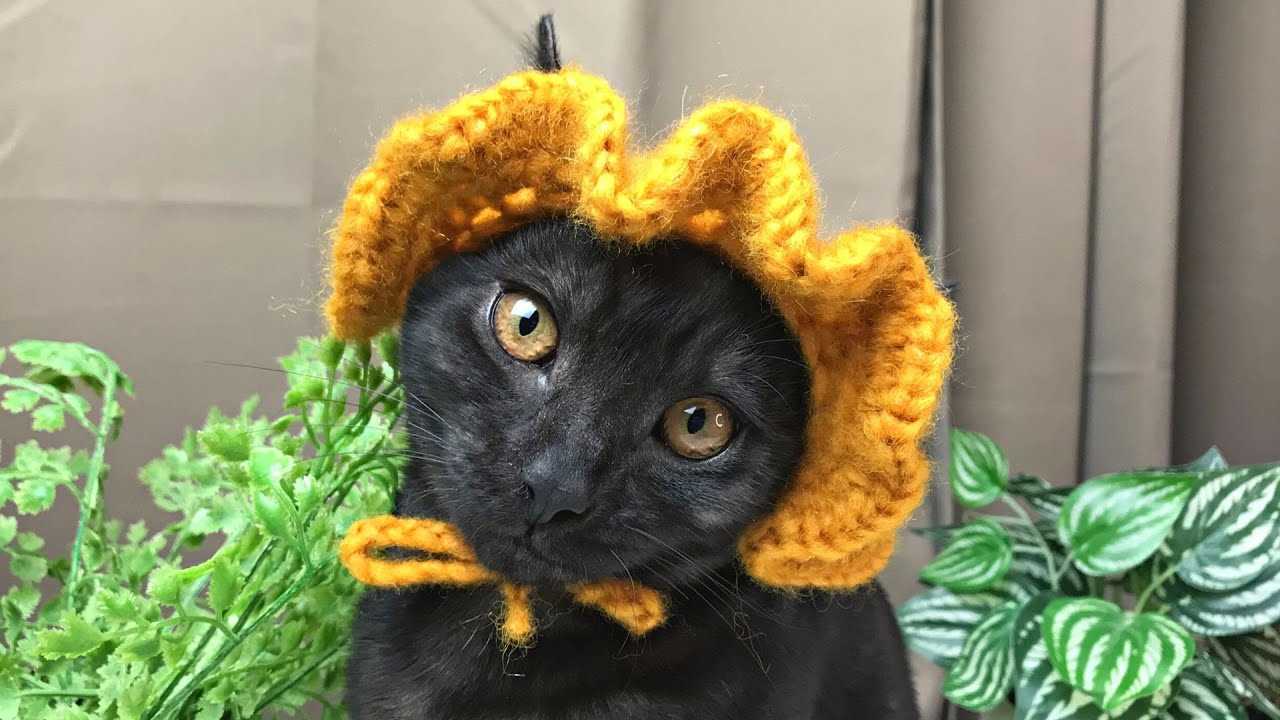
As you work, keep an eye on the progress. Aim for a length that covers the ears while leaving enough room at the top for a little playful flap or pom-pom. This adds a fun element that both you and your furry friend will appreciate. Don’t forget to check the fit along the way!
Finally, finish off with a neat bind-off, ensuring the edges are tidy. Weave in any loose ends to prevent snagging on your kitty’s playful paws. Once complete, the cozy creation will not only keep your pet warm but also make a delightful addition to their wardrobe.
Choosing the Right Yarn and Needles

Opt for soft, non-irritating materials like acrylic or cotton blends. These fibers will ensure comfort while I prance around. A medium weight is preferable; it provides warmth without being overly bulky. Use size 4 or 5 needles for a snug yet flexible fit. This combination allows for easy handling and quick progress.
Consider color choices too! Bright shades or playful patterns can add charm to my look. Don’t shy away from sparkles or fun textures–these make for excellent Instagram content. A little flair goes a long way in making me the star of the show!
Choosing the Right Yarn and Needles for Your Feline’s Accessory
Select a soft, lightweight yarn to ensure comfort. Natural fibers like cotton or bamboo are great choices, as they are breathable and gentle on fur.
Opt for a medium weight (worsted) yarn, which provides warmth without being too heavy. Avoid wool if your furry friend has sensitive skin, as it may cause irritation.
- Cotton: Breathable and hypoallergenic, perfect for all seasons.
- Bamboo: Soft and eco-friendly, offers a nice drape.
- Blends: Yarn that combines different fibers can give you the best of both worlds.
For needles, choose a size that matches your yarn’s thickness. Typically, US size 8 (5 mm) needles work well with medium weight yarn. Circular or straight needles can be used, depending on your preference.
- Check the yarn label for recommended needle sizes.
- Consider bamboo or plastic needles for easier grip, especially if you’re a beginner.
Always test a small swatch before starting the main project to ensure the texture and fit are comfortable for your companion.
Measuring Your Cat’s Head for a Perfect Fit
To ensure a snug yet comfortable fit, grab a soft measuring tape. Start by measuring the circumference around the widest part of the head, which typically is just above the ears. Make sure the tape is snug but not too tight, allowing for a little wiggle room. Record the measurement in inches or centimeters.
Next, measure from the top of the head down to just above the eyes. This vertical measurement helps determine how deep the cap should be. If your furry friend has a unique shape, consider taking additional measurements around the ears and under the chin for a tailored design.
Once you’ve gathered these figures, you can adjust your pattern accordingly. A little extra length can be useful for fold-over edges, while a bit more width ensures comfort without constriction. For tips on pet behaviors, check out why do dogs like cat poop.
Before you start crafting, double-check your measurements to avoid any mishaps. An ill-fitting accessory may end up being more of a nuisance than a fashion statement. If you’re curious about other feline topics, you can learn more about the gestation period of our kind by visiting how long are cats pregnant for before giving birth.
Step-by-Step Knitting Techniques for Cat Hats
Begin with casting on the required number of stitches based on your earlier measurements. Use a stretchy cast-on method, as it ensures comfort when wearing the headpiece. I prefer the long-tail cast-on; it gives a nice, flexible edge.
Once you’ve cast on, work in the chosen stitch pattern. A ribbing pattern, such as K1, P1, provides elasticity, allowing the creation to hug snugly without being too tight. Aim for about 2-3 inches of ribbing before transitioning into the main body of the piece.
Shaping the Crown
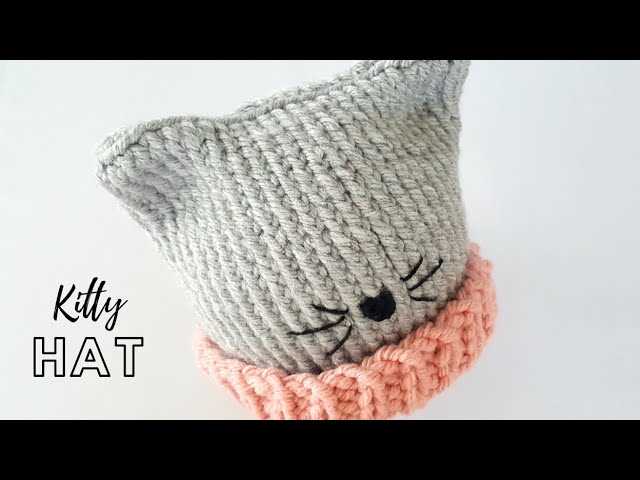
After achieving the desired height in the body, it’s time to shape the top. Begin decreasing every few rows to create a rounded shape. Use a simple decrease technique: knit two together at regular intervals. This creates a smooth transition that won’t irritate sensitive ears.
Continue decreasing until only a few stitches remain. Cut the yarn, leaving a long tail. Thread the tail through the remaining stitches and pull tight to close the top. This method prevents any gaps and ensures warmth.
Finishing Touches
Weave in any loose ends with a yarn needle to keep the structure neat. If desired, add embellishments such as a pom-pom or ears by knitting separate pieces and attaching them securely. Always ensure that any additions are firmly stitched to avoid any choking hazards.
Finally, give the creation a gentle wash to remove any fibers from the knitting process. Lay it flat to dry, and soon it will be ready for a stylish debut!
First, gather your supplies: soft yarn in your favorite color and a pair of needles suitable for your chosen material. Choose a blend that offers warmth and comfort, ensuring it feels nice against delicate fur.
Next, measure your companion’s head circumference. This can be done with a soft measuring tape, wrapping it gently around the largest part of their head. Add a little extra for comfort; it’s crucial that the final piece is snug but not constrictive.
Cast on the required stitches based on the measurement you took. A stretchy cast-on method will help the finished item fit better. Use a simple ribbing technique to create a stretchy band that will hug their head comfortably. This will also add a nice texture to the piece.
As you work, keep an eye on the progress. Aim for a length that covers the ears while leaving enough room at the top for a little playful flap or pom-pom. This adds a fun element that both you and your furry friend will appreciate. Don’t forget to check the fit along the way!
Finally, finish off with a neat bind-off, ensuring the edges are tidy. Weave in any loose ends to prevent snagging on your kitty’s playful paws. Once complete, the cozy creation will not only keep your pet warm but also make a delightful addition to their wardrobe.
Choosing the Right Yarn and Needles
Opt for soft, non-irritating materials like acrylic or cotton blends. These fibers will ensure comfort while I prance around. A medium weight is preferable; it provides warmth without being overly bulky. Use size 4 or 5 needles for a snug yet flexible fit. This combination allows for easy handling and quick progress.
Consider color choices too! Bright shades or playful patterns can add charm to my look. Don’t shy away from sparkles or fun textures–these make for excellent Instagram content. A little flair goes a long way in making me the star of the show!
Choosing the Right Yarn and Needles for Your Feline’s Accessory
Select a soft, lightweight yarn to ensure comfort. Natural fibers like cotton or bamboo are great choices, as they are breathable and gentle on fur.
Opt for a medium weight (worsted) yarn, which provides warmth without being too heavy. Avoid wool if your furry friend has sensitive skin, as it may cause irritation.
- Cotton: Breathable and hypoallergenic, perfect for all seasons.
- Bamboo: Soft and eco-friendly, offers a nice drape.
- Blends: Yarn that combines different fibers can give you the best of both worlds.
For needles, choose a size that matches your yarn’s thickness. Typically, US size 8 (5 mm) needles work well with medium weight yarn. Circular or straight needles can be used, depending on your preference.
- Check the yarn label for recommended needle sizes.
- Consider bamboo or plastic needles for easier grip, especially if you’re a beginner.
Always test a small swatch before starting the main project to ensure the texture and fit are comfortable for your companion.
Measuring Your Cat’s Head for a Perfect Fit
To ensure a snug yet comfortable fit, grab a soft measuring tape. Start by measuring the circumference around the widest part of the head, which typically is just above the ears. Make sure the tape is snug but not too tight, allowing for a little wiggle room. Record the measurement in inches or centimeters.
Next, measure from the top of the head down to just above the eyes. This vertical measurement helps determine how deep the cap should be. If your furry friend has a unique shape, consider taking additional measurements around the ears and under the chin for a tailored design.
Once you’ve gathered these figures, you can adjust your pattern accordingly. A little extra length can be useful for fold-over edges, while a bit more width ensures comfort without constriction. For tips on pet behaviors, check out why do dogs like cat poop.
Before you start crafting, double-check your measurements to avoid any mishaps. An ill-fitting accessory may end up being more of a nuisance than a fashion statement. If you’re curious about other feline topics, you can learn more about the gestation period of our kind by visiting how long are cats pregnant for before giving birth.
Step-by-Step Knitting Techniques for Cat Hats
Begin with casting on the required number of stitches based on your earlier measurements. Use a stretchy cast-on method, as it ensures comfort when wearing the headpiece. I prefer the long-tail cast-on; it gives a nice, flexible edge.
Once you’ve cast on, work in the chosen stitch pattern. A ribbing pattern, such as K1, P1, provides elasticity, allowing the creation to hug snugly without being too tight. Aim for about 2-3 inches of ribbing before transitioning into the main body of the piece.
Shaping the Crown
After achieving the desired height in the body, it’s time to shape the top. Begin decreasing every few rows to create a rounded shape. Use a simple decrease technique: knit two together at regular intervals. This creates a smooth transition that won’t irritate sensitive ears.
Continue decreasing until only a few stitches remain. Cut the yarn, leaving a long tail. Thread the tail through the remaining stitches and pull tight to close the top. This method prevents any gaps and ensures warmth.
Finishing Touches
Weave in any loose ends with a yarn needle to keep the structure neat. If desired, add embellishments such as a pom-pom or ears by knitting separate pieces and attaching them securely. Always ensure that any additions are firmly stitched to avoid any choking hazards.
Finally, give the creation a gentle wash to remove any fibers from the knitting process. Lay it flat to dry, and soon it will be ready for a stylish debut!