


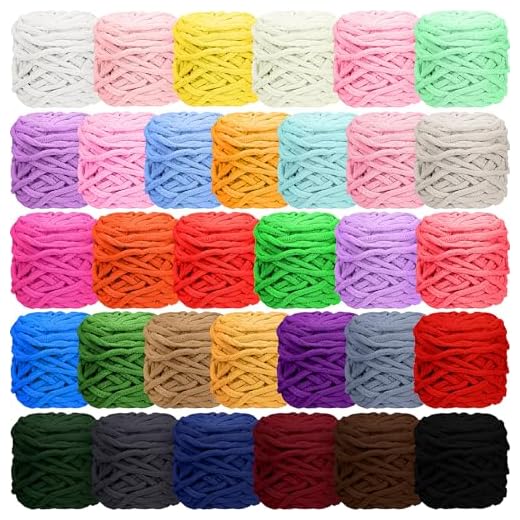
For a purr-fect retreat, focus on using a soft, chunky yarn that provides warmth and comfort. I recommend selecting a color that matches your home decor or your furry friend’s personality. A blend of cotton and acrylic works wonders for durability and ease of cleaning.
Gather your supplies: a large hook, scissors, and a tapestry needle. Begin crafting the base by creating a sturdy foundation with a series of stitches. This will ensure stability and a cozy space for lounging. Aim for a circular shape that allows for enough room to stretch out while still feeling snug.
As you build the walls, increase the stitch count gradually to create height. This part is crucial for offering a secure environment. Don’t forget to leave an opening for easy access, allowing your whiskered companion to enter and exit with ease. Add some personality by integrating fun patterns or textures into the design.
Crafting a Cozy Retreat
Start with a thick yarn that provides warmth and durability. A cotton or wool blend works perfectly. Choose a large hook for a loose, flexible structure.

Begin by making a magic ring, then crochet a series of double crochets to form a base. Aim for a 12 to 14-inch diameter to ensure enough space for lounging.
For the walls, create a series of rows using half double crochets. Increase the stitch count gradually to achieve a rounded shape. This will give your space the necessary height and comfort.
When the walls reach about 10 inches, switch to a decorative stitch for the top edge. This adds a unique flair and a bit of flair to the overall design.
To finish, weave in any loose ends and consider adding a soft cushion inside for extra comfort. This will make the retreat even more inviting for your furry friends.
Selecting the Right Yarn and Hook Size for Your Cozy Nook
For a snug hideaway, I recommend using bulky yarn, specifically those labeled as weight category 5 or 6. This thickness ensures warmth and durability, perfect for my feline friends who love to curl up and nap. Look for materials like acrylic or wool blends for easy maintenance and comfort.
Hook Size
A size J (6.0 mm) or K (6.5 mm) hook works best with bulky yarn. This size creates a firm structure while still allowing enough flexibility for the cozy space. Using the wrong hook may lead to a loose or overly tight finish, impacting the overall comfort of the resting spot.
Yarn and Hook Compatibility
| Yarn Weight | Recommended Hook Size |
|---|---|
| Bulky (5) | J (6.0 mm) |
| Super Bulky (6) | K (6.5 mm) |
Choosing the right combination ensures my resting area is both stylish and functional, just like I like it. Always check the yarn label for specific recommendations, as they can vary by brand. Happy crafting!
Step-by-Step Instructions for Crafting the Base and Walls
Begin with a magic ring to create the foundation. Chain 2, then work 12 double crochets into the ring. Pull the tail to tighten it, forming a circle. Join the last stitch to the first using a slip stitch for a seamless finish.
For the first round, create 2 double crochets in each stitch around, giving you 24 stitches total. In the second round, alternate between 1 double crochet and 2 double crochets in each stitch to increase to 36 stitches. Continue increasing in this manner until the base reaches your desired diameter. I prefer a size that fits snugly in my favorite sunny spot.
Now, switch to building the walls. For the next few rounds, simply work one double crochet into each stitch without increasing. This will give the structure height and stability. Keep checking the height; I like mine to be about 10 inches tall for a cozy feel.
As you approach the desired height, consider adding a decorative edge. A row of single crochet can create a nice finishing touch. If you want to add flair, use a contrasting color for this last round.
Be mindful of your yarn choice; some materials are safe while others might not be suitable. For instance, be sure to avoid anything toxic like green onions. If curious about pet safety, check out if is green onion toxic to cats.
Once you’ve completed the walls, weave in the ends and make sure everything is secure. Now, your creation is ready for some lounging. If you’re wondering about my diet, be sure to read about whether does cat really eat mice on my blog!
Finishing Touches: Adding Comfort and Style to Your Feline Retreat
To elevate my cozy sanctuary, I recommend incorporating a soft lining. Fleece or minky fabric works wonders. Cut it to fit the inner dimensions snugly, and secure it with fabric glue or stitches for a polished look.
For added flair, consider decorative elements. Pom-poms or tassels can be attached to the entrance, giving it a playful vibe. Select colors that complement the outer design–this will make everything pop.
Utilize a non-slip base. Adding a rubberized mat or felt pads underneath prevents sliding and keeps the retreat stable during my playful antics.
Comfort is key. Fill the interior with a cushy pillow or soft blanket. This not only enhances coziness but also creates a space where I can lounge and nap in style.
Lastly, personalize it! A nameplate or an embroidered patch can add a unique touch. This makes the space distinctly mine and showcases my personality.
For a purr-fect retreat, focus on using a soft, chunky yarn that provides warmth and comfort. I recommend selecting a color that matches your home decor or your furry friend’s personality. A blend of cotton and acrylic works wonders for durability and ease of cleaning.
Gather your supplies: a large hook, scissors, and a tapestry needle. Begin crafting the base by creating a sturdy foundation with a series of stitches. This will ensure stability and a cozy space for lounging. Aim for a circular shape that allows for enough room to stretch out while still feeling snug.
As you build the walls, increase the stitch count gradually to create height. This part is crucial for offering a secure environment. Don’t forget to leave an opening for easy access, allowing your whiskered companion to enter and exit with ease. Add some personality by integrating fun patterns or textures into the design.
Crafting a Cozy Retreat
Start with a thick yarn that provides warmth and durability. A cotton or wool blend works perfectly. Choose a large hook for a loose, flexible structure.
Begin by making a magic ring, then crochet a series of double crochets to form a base. Aim for a 12 to 14-inch diameter to ensure enough space for lounging.
For the walls, create a series of rows using half double crochets. Increase the stitch count gradually to achieve a rounded shape. This will give your space the necessary height and comfort.
When the walls reach about 10 inches, switch to a decorative stitch for the top edge. This adds a unique flair and a bit of flair to the overall design.
To finish, weave in any loose ends and consider adding a soft cushion inside for extra comfort. This will make the retreat even more inviting for your furry friends.
Selecting the Right Yarn and Hook Size for Your Cozy Nook
For a snug hideaway, I recommend using bulky yarn, specifically those labeled as weight category 5 or 6. This thickness ensures warmth and durability, perfect for my feline friends who love to curl up and nap. Look for materials like acrylic or wool blends for easy maintenance and comfort.
Hook Size
A size J (6.0 mm) or K (6.5 mm) hook works best with bulky yarn. This size creates a firm structure while still allowing enough flexibility for the cozy space. Using the wrong hook may lead to a loose or overly tight finish, impacting the overall comfort of the resting spot.
Yarn and Hook Compatibility
| Yarn Weight | Recommended Hook Size |
|---|---|
| Bulky (5) | J (6.0 mm) |
| Super Bulky (6) | K (6.5 mm) |
Choosing the right combination ensures my resting area is both stylish and functional, just like I like it. Always check the yarn label for specific recommendations, as they can vary by brand. Happy crafting!
Step-by-Step Instructions for Crafting the Base and Walls
Begin with a magic ring to create the foundation. Chain 2, then work 12 double crochets into the ring. Pull the tail to tighten it, forming a circle. Join the last stitch to the first using a slip stitch for a seamless finish.
For the first round, create 2 double crochets in each stitch around, giving you 24 stitches total. In the second round, alternate between 1 double crochet and 2 double crochets in each stitch to increase to 36 stitches. Continue increasing in this manner until the base reaches your desired diameter. I prefer a size that fits snugly in my favorite sunny spot.
Now, switch to building the walls. For the next few rounds, simply work one double crochet into each stitch without increasing. This will give the structure height and stability. Keep checking the height; I like mine to be about 10 inches tall for a cozy feel.
As you approach the desired height, consider adding a decorative edge. A row of single crochet can create a nice finishing touch. If you want to add flair, use a contrasting color for this last round.
Be mindful of your yarn choice; some materials are safe while others might not be suitable. For instance, be sure to avoid anything toxic like green onions. If curious about pet safety, check out if is green onion toxic to cats.
Once you’ve completed the walls, weave in the ends and make sure everything is secure. Now, your creation is ready for some lounging. If you’re wondering about my diet, be sure to read about whether does cat really eat mice on my blog!
Finishing Touches: Adding Comfort and Style to Your Feline Retreat
To elevate my cozy sanctuary, I recommend incorporating a soft lining. Fleece or minky fabric works wonders. Cut it to fit the inner dimensions snugly, and secure it with fabric glue or stitches for a polished look.
For added flair, consider decorative elements. Pom-poms or tassels can be attached to the entrance, giving it a playful vibe. Select colors that complement the outer design–this will make everything pop.
Utilize a non-slip base. Adding a rubberized mat or felt pads underneath prevents sliding and keeps the retreat stable during my playful antics.
Comfort is key. Fill the interior with a cushy pillow or soft blanket. This not only enhances coziness but also creates a space where I can lounge and nap in style.
Lastly, personalize it! A nameplate or an embroidered patch can add a unique touch. This makes the space distinctly mine and showcases my personality.


