


First off, select a calm and quiet area for this task. A space free of distractions helps to keep both you and your furry friend relaxed. Ensure you have everything prepared beforehand: the hydration solution, a syringe or bag with a needle, and some treats for positive reinforcement.
Position your companion comfortably, whether on a table or your lap. Supporting their body gently, locate the area between the shoulder blades where the skin can be easily lifted to create a pocket. This spot is ideal for the procedure, as it allows for proper absorption.
With a steady hand, insert the needle at a slight angle into the pocket created by the lifted skin. It’s crucial to do this swiftly and confidently to minimize discomfort. Once the needle is in place, slowly release the hydration solution, keeping an eye on your buddy’s reactions. If they seem anxious, pause and offer gentle reassurances.

After completing the process, carefully remove the needle and observe the site for any signs of swelling or discomfort. Reward your companion with their favorite treat, reinforcing the positive experience. Regular practice in a calm manner can help make this necessary task easier over time.
Administering Hydration to a Challenging Feline
Choose a quiet, comfortable space for the task. Ensure minimal distractions to create a calm environment. A soft blanket or towel can help keep your companion relaxed and secure.
Gather Necessary Supplies
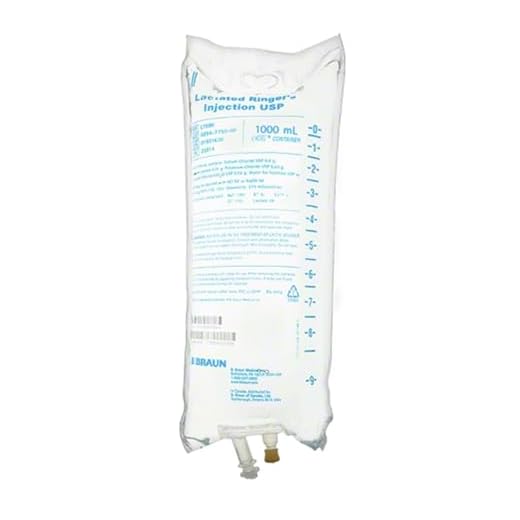
- IV bag with the appropriate solution.
- Needle (18-22 gauge, depending on size).
- IV line or administration set.
- Alcohol wipes for sterilization.
- Tape or adhesive to secure the needle.
Prepare and Position
- Warm the solution by holding the bag under your arm for a few minutes.
- Have someone assist by gently holding your friend, or wrap them snugly in a towel, leaving only the neck exposed.
- Find a suitable site for insertion, typically between the shoulder blades.
With everything ready, approach the procedure with a calm demeanor. Speak softly to soothe your friend during the process. If they resist, take breaks and try again later. Patience is key; it might take a few attempts for your furry companion to adjust.
Choosing the Right Location for Injection
To ensure a smooth process, select a spot where I feel most comfortable. The ideal zones are typically the scruff of the neck or between the shoulder blades.
Consider these points:
- Scruff of the Neck: This area provides enough loose skin for an easy insert without causing discomfort.
- Between Shoulder Blades: Another preferred site, as it allows for a good pinch of skin to form a pocket.
Test the skin’s elasticity by gently pinching it. If it readily springs back, it’s a suitable location.
Avoid areas with fur matting or irritation to prevent unnecessary stress. A clean, calm environment will help me relax during the procedure.
Always ensure that the chosen site is free from any perceived threats or distractions, as this can lead to resistance. Your confidence and calmness will influence my behavior significantly.
Preparing the Equipment and Fluids
Gather all necessary items before starting the procedure. You will need a sterile bag of liquid, appropriate administration set, and a clean needle. Ensure the needle gauge is suitable for easy insertion and fluid flow. A 20-gauge needle typically works well for larger volumes, while a 22-gauge may suffice for smaller amounts.
Choosing the Right Fluids
Select the correct type of solution based on your needs. Common options include lactated Ringer’s solution or normal saline. Check expiration dates and inspect the bag for any leaks or discoloration. If using a new bag, be sure to remove the protective cap from the spike before connecting it to the tubing.
Setting Up the Administration Set
Once you have the bag ready, attach the administration set. Prime the tubing by allowing a small amount of liquid to flow through, eliminating air bubbles. This step ensures a smooth flow during the process.
Keep everything within easy reach. A soft towel or blanket can serve as a comfortable resting spot during the procedure. Prepare treats or toys nearby for distraction and positive reinforcement.
Calming Your Cat Before the Procedure
Playing soft music can create a relaxing atmosphere. Choose calming tunes that are soothing and low in volume.
Utilize pheromone diffusers or sprays to help reduce anxiety. These products mimic natural feline pheromones, promoting a sense of security.
Establish a quiet and comfortable space for the process. A cozy blanket or bed can provide a familiar environment, making me feel more at ease.
Engage in gentle petting or brushing beforehand. This not only builds trust but also distracts me from any apprehension.
Consider offering a favorite treat or snack to create positive associations. This can help shift my focus from stress to a reward, enhancing comfort.
Limit handling and commotion during the procedure. A calm approach from my human can significantly influence my demeanor.
Incorporate interactive playtime prior to the event. This can reduce excess energy and help me to feel more relaxed.
For more insights on health and well-being, check this link: where does protein digestion end.
Technique for Administering Fluids
Position yourself comfortably behind the feline, ensuring a steady grip on the scruff of the neck. This provides both control and reassurance. Pinch the skin gently to form a tent, creating a space for the needle insertion. Aim for the center of the tent, using a swift, smooth motion to insert the needle at a shallow angle, typically around 30 degrees. This minimizes discomfort and facilitates an easier flow.
Once the needle is in place, connect the line to the fluid bag. Ensure the clamp is open to allow the solution to flow. Observe for any resistance or signs of discomfort. If the cat shows signs of distress, pause momentarily to reassure and calm the pet before continuing. Maintain a steady flow rate; this can be adjusted based on the cat’s comfort level and the type of solution being administered.
Post-Procedure Steps
After administration, gently withdraw the needle and apply light pressure at the injection site with a clean cotton ball or gauze to prevent any leakage. Monitor the area for swelling or redness, which could indicate complications. Reward your furry friend with a treat or some affection to create a positive association with the experience.

Cleanup and Storage
Dispose of the needle and any used materials safely in a sharps container. Store the remaining solution in a cool, dry place, ensuring it is labeled and dated for future use. Always check expiration dates before the next use. Clean the area where the procedure took place to maintain hygiene and comfort.
Monitoring Your Feline Friend During and After the Process
Keep a close eye on my behavior during the administration of fluids. Look for signs of stress, such as panting or attempts to escape. If I seem agitated, gently talk to me in a soothing voice to help calm my nerves.
After the procedure, observe me for any unusual reactions. Check for swelling at the injection site or signs of discomfort. If I seem lethargic or unresponsive, consult a vet immediately. Hydration is key, so ensure I have access to fresh water afterward.
Watch for any changes in my eating habits or litter box usage. If I drink excessively or show signs of vomiting, it’s important to get in touch with the vet. Remember, my health is the priority.
Lastly, while you’re managing my care, consider protecting me from fleas. For that, check out the best flea dip for cats to keep me comfortable and healthy.
Handling Complications and Reactions
If I start to squirm or vocalize during the process, it’s crucial for my human to remain calm. A gentle voice can help soothe my nerves. If I become overly stressed, pausing the procedure for a moment may allow me to settle down before trying again.
In case of swelling or redness at the injection site, applying a warm compress can alleviate discomfort. My human should monitor for signs of infection, such as pus or persistent irritation, and consult a veterinarian if these symptoms arise.
Occasionally, I may experience a mild reaction to the solution. If I show signs like vomiting or diarrhea, stopping the infusion immediately is essential. Contacting a vet should be the next step if these reactions occur.
For those who worry about air bubbles in the line, it’s important to inspect the setup before starting. If bubbles are present, gently tapping the line can help dislodge them. Ensuring a smooth flow is key to avoiding unnecessary discomfort.
Finally, my human should always keep an eye on my overall demeanor during and after the process. If I seem lethargic or unwell afterward, it’s best to seek veterinary advice promptly. Recognizing subtle changes in behavior can make a significant difference in my recovery.


