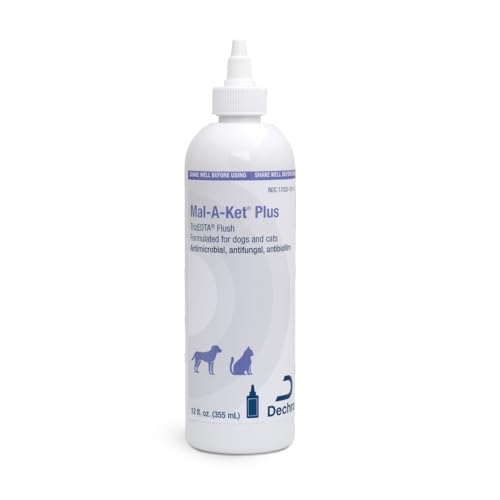


First, gather all necessary supplies: a veterinarian-approved solution, cotton balls, and treats to reward your furry companion. Begin by gently restraining your pet in a comfortable position, ensuring they feel safe and secure during the process.
Next, apply a few drops of the treatment into the affected area. This product will help to dislodge any critters and debris. Massage the base of the ear gently for about 30 seconds to ensure the solution penetrates effectively. This step is crucial for optimal results.
Afterward, use a cotton ball to carefully wipe away any excess fluid and dirt. Be sure to avoid using Q-tips, as they can push debris further into the ear canal or cause injury. Follow up with a tasty treat to create a positive association with the process.
Keep a close eye on your kitty for the next few days. Regularly check their ears for signs of improvement or any lingering issues. If symptoms persist, consult your veterinarian for further guidance. Your companion’s comfort and health should always be the top priority.
Removing Ear Pests
Regular checks for debris or dark wax are necessary. If you spot any unusual buildup, it’s time to take action.
Gather supplies: a vet-approved solution, cotton balls, and treats for a positive experience. Moisten a cotton ball with the solution and gently wipe the inner ear flap and the canal. Avoid using cotton swabs, as they can push dirt further in.
After treatment, reward yourself with a tasty snack. This helps create a positive association with the cleaning routine.
Monitor progress by checking the ears daily. If irritation persists or worsens, a visit to the vet is essential for further evaluation and treatment.
Keep the environment clean by washing bedding and avoiding shared spaces with other pets until the situation resolves.
Identifying Symptoms of Ear Mites in Cats
Pay attention to these signs if you suspect an infestation:
- Frequent scratching of the head and ears.
- Shake of the head more than usual.
- Presence of dark, crumbly debris in the ears, resembling coffee grounds.
- Unpleasant odor emanating from the ear area.
- Inflammation or redness inside the ears.
- Behavioral changes, such as increased irritability or reluctance to be touched.
- Excessive wax build-up.
Observing Behavioral Changes
Watch for shifts in mood or routines, such as:
- Hiding or avoiding social interaction.
- Increased grooming behavior around the ears.
- Expressing discomfort when the ears are touched.
Monitoring Health Conditions
Keep an eye out for:
- Signs of secondary infections, like discharge or swelling.
- Hair loss around the ears due to scratching.
- Changes in appetite or energy levels.
If you notice any of these symptoms, consulting a veterinarian is advisable for accurate diagnosis and treatment options.
Gathering Necessary Supplies for Treatment
To tackle those irritating invaders effectively, I recommend gathering the following items:
- Veterinarian-prescribed medication for elimination.
- Cotton balls or pads for gentle application.
- A soft, clean towel to keep the area tidy.
- Pet-safe cleaning solution for surfaces to avoid re-infestation.
- A small jar or container for storing used materials.
Ensure that all tools are clean and sanitized before use. This helps prevent any additional irritations or infections. If you are unsure about the cleaning supplies, you can refer to resources like can i use koh scrubber on tiles for safe options.
Keep everything organized to streamline the process, making it quicker and less stressful for both of us. Trust me; a little preparation goes a long way in making this experience smoother!
Administering Cleaning Solutions Safely
Always ensure the product is specifically designed for feline use. Verify the label for cat compatibility before application. Use a few drops of the solution; a little goes a long way. Gently tilt my head to the side for better absorption, and avoid flooding the ear canal.
Secure my body calmly during the process, using a towel if needed to prevent sudden movements. If I seem uncomfortable, pause and offer reassurance. It’s vital to maintain a stress-free environment. Avoid using cotton swabs, as they can push debris deeper or injure sensitive areas.
After applying the solution, massage the base of my ear gently to help distribute the liquid. This aids in softening any buildup without causing discomfort. Allow me to shake my head afterward to expel excess fluid. Have some treats handy to reward good behavior and create positive associations with the experience.
Pay attention to my reactions; if I show signs of pain or irritation, discontinue use and consult a veterinarian. Regularly monitor the condition of my ears post-treatment to ensure progress. Documentation of any changes helps provide insights during follow-up visits.
Proper Techniques for Cleaning Cat Ears
First, ensure a calm environment. I prefer soft lighting and a quiet space. Grab a comfortable towel to wrap me up, leaving just my head exposed. This prevents sudden movements.
Next, use a gentle, vet-approved solution. Apply a few drops into my ear canal while keeping my head upright. Massage the base of the ear gently for about 30 seconds. This helps the solution reach deeper.
Tools Required
| Item | Purpose |
|---|---|
| Soft Towels | To wrap and secure |
| Ear Cleaning Solution | To dissolve debris |
| Cotton Balls | For wiping excess fluid |
| Pet-Safe Tweezers | To remove larger clumps, if needed |
After massaging, let me shake my head. This helps dislodge dirt. Use a cotton ball to gently wipe the outer ear, avoiding deep penetration. Repeat this process every few days until the issue resolves.
Always reward me with treats after the process. This builds a positive association and makes future sessions easier. Keeping a consistent routine will help maintain healthy ears.
Post-Cleaning Care and Monitoring
After addressing those annoying invaders, it’s crucial to keep an eye on my ears for any signs of lingering trouble. Regularly check for excessive scratching or shaking of my head. If you notice any discharge or an unusual smell, it’s time to consult a vet.
Maintaining a clean environment helps prevent a return. Ensure my bedding is regularly washed and my favorite lounging spots are kept tidy. This reduces the chances of reinfestation.
Incorporating a routine ear inspection can be beneficial. Gently look inside my ears weekly to catch any issues early. I don’t mind a little pampering, so make it a bonding time!
Don’t forget to reward me after treatments and checks. Positive reinforcement makes the experience pleasant and helps me associate it with good times. A cozy space, like a best cat carrier for large cats, can provide comfort during recovery.
Stay vigilant and proactive, and I’ll be back to my playful self in no time!
When to Consult a Veterinarian
If you notice persistent signs of discomfort, it’s time to reach out to a vet. Symptoms like excessive scratching, shaking of the head, or unusual discharge can indicate a more severe issue.
Seek professional help if the following conditions arise:
| Condition | Action |
|---|---|
| Severe redness or swelling | Visit the vet immediately for a thorough examination. |
| Strong odor from the auditory canal | Consultation is necessary to rule out infections. |
| Signs of secondary infections (e.g., pus or blood) | Prompt veterinary attention is required. |
| Lethargy or loss of appetite | Schedule an appointment for a comprehensive health check. |
| Changes in behavior or excessive vocalization | Assess whether a visit is needed based on these changes. |
Timely intervention can prevent complications and ensure a quick recovery. Always trust your instincts regarding your well-being.
Preventative Measures to Avoid Future Infestations
Regular checks of my favorite resting spots are a must. Keeping my sleeping area clean helps reduce the chances of unwelcome visitors. Vacuuming frequently and washing bedding can make a significant difference.
Socializing with other furry friends is fun, but I always ensure they are healthy. Monitoring their condition before playdates is essential to prevent sharing any unwanted guests. A quick inspection of their ears can help spot potential issues early.
Maintain a Clean Environment
Dust and debris can harbor all sorts of critters. I encourage my human to dust surfaces and minimize clutter. Regularly cleaning the home reduces hiding places for any intruders.
Promote Good Hygiene
Daily grooming is not just for aesthetics; it helps in spotting any problems before they escalate. My human uses a soft brush to keep me tidy and checks my ears during each session. This routine makes it easier to notice anything unusual.
Lastly, staying on top of regular vet visits ensures that I remain in tip-top shape. My human makes sure to schedule check-ups, which include ear examinations. Keeping vaccinations up to date also contributes to overall health and well-being.
FAQ:
What are ear mites in cats and how do I know if my cat has them?
Ear mites are tiny parasites that infest the ears of cats, causing irritation and discomfort. If your cat has ear mites, you may notice symptoms such as excessive scratching at the ears, shaking of the head, and a dark, waxy discharge from the ears. A veterinarian can confirm the presence of ear mites through a physical examination and possibly by taking a sample from the ear canal to examine under a microscope.
How can I clean my cat’s ears to remove ear mites?
To clean your cat’s ears, you should first get a veterinarian-recommended ear cleaner. Gently lift your cat’s ear flap and apply the cleaner as directed. Massage the base of the ear to help loosen any debris. Then, use a cotton ball or soft cloth to wipe away the dirt and wax. Be sure not to insert anything deep into the ear canal, as this can cause injury. After cleaning, follow up with the appropriate treatment prescribed by your veterinarian to eliminate the mites.
Are there home remedies for treating ear mites in cats?
While some home remedies, such as diluted apple cider vinegar or mineral oil, are suggested by pet owners, they may not be effective and can potentially irritate the ear further. It is best to consult your veterinarian before trying any home treatments. They can prescribe safe and effective medications to treat ear mites and ensure that your cat receives proper care.
How can I prevent ear mites from returning in my cat?
To prevent a recurrence of ear mites, keep your cat’s living environment clean and free from other pets that may be infected. Regularly check your cat’s ears for signs of mites or irritation, and maintain a routine of ear cleaning as directed by your veterinarian. Ensuring your cat is healthy and stress-free can also contribute to their overall well-being, making them less susceptible to infestations.


