


For immediate action, grab a paper towel to blot the area. Press down gently to absorb as much liquid as possible without spreading it further. It’s crucial not to rub, as this can push the stain deeper into the wood.
After blotting, create a mixture of equal parts white vinegar and water. This natural solution can help neutralize odors and break down any lingering residues. Apply it to a clean cloth and wipe the affected area gently, ensuring you don’t soak the wood.

To finish, sprinkle a bit of baking soda over the damp spot. This will help absorb any remaining moisture and odors. Leave it for a few hours, then sweep or vacuum it up. Your wooden surface will thank you for the quick response!
Removing Unwanted Odors
First, grab some paper towels. Blot the area gently to absorb as much liquid as possible. Don’t rub; it might spread the liquid deeper into the wood.
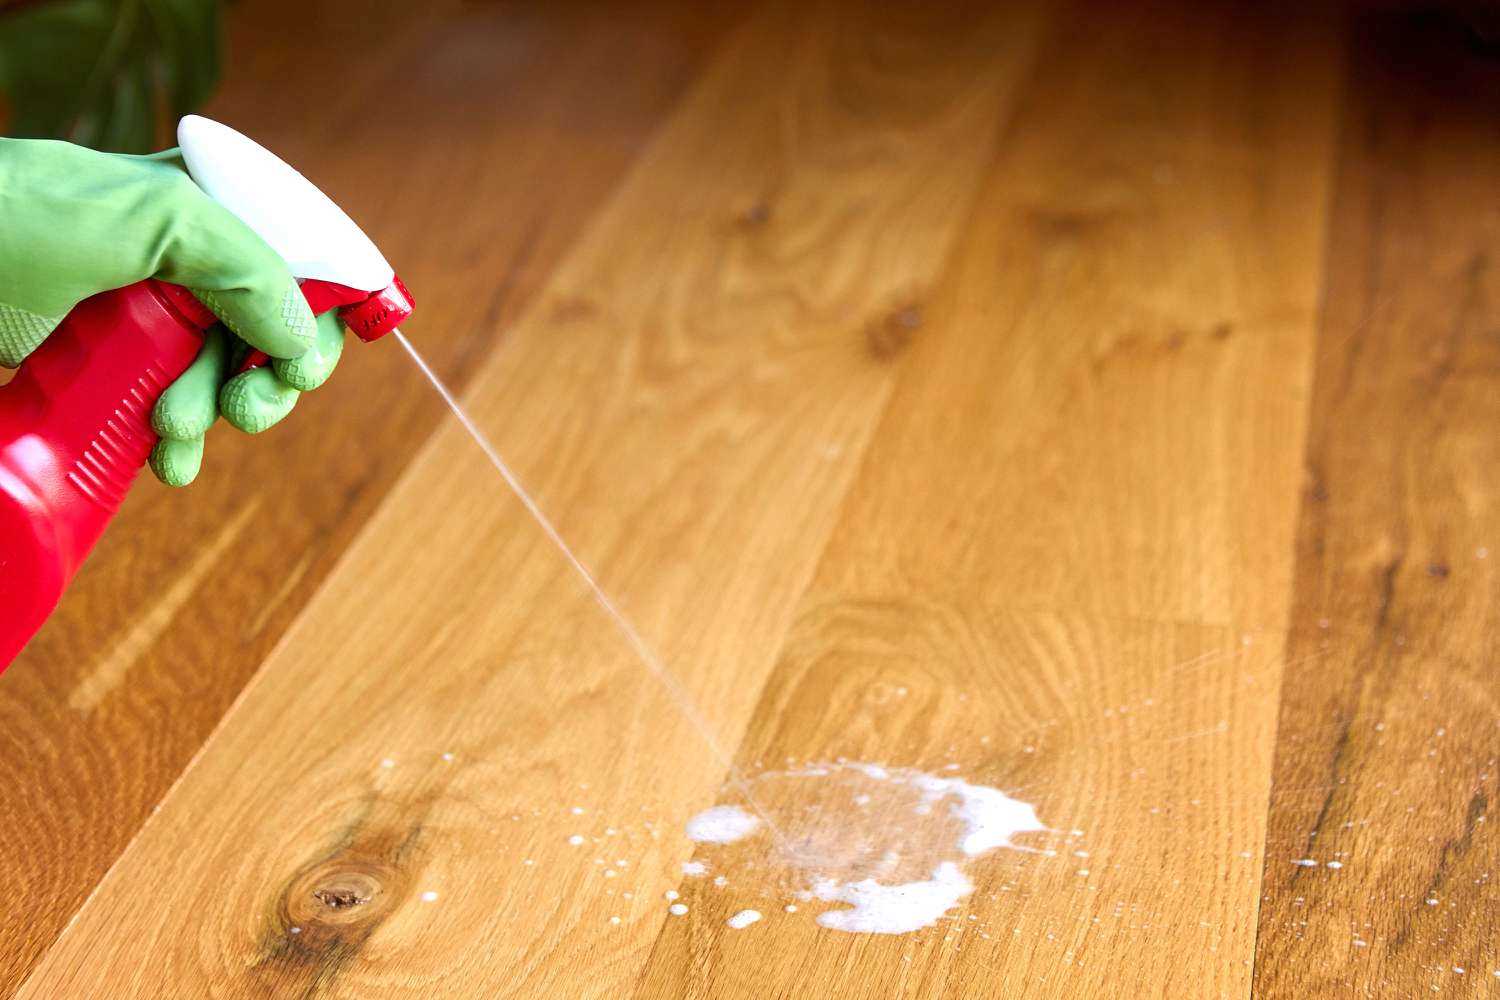
Next, mix white vinegar and water in equal parts in a spray bottle. Spray the solution on the spot, letting it sit for about 5 minutes. This helps neutralize the smell.
After that, use a clean cloth to wipe the area. Rinse the cloth frequently to avoid spreading the odor. If needed, repeat the vinegar solution application.
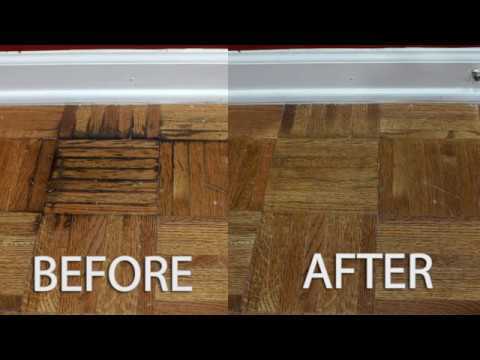
Dealing with Stains
For persistent stains, sprinkle baking soda over the area after drying with a cloth. Leave it for a few hours or overnight. Vacuum the baking soda afterward, which helps absorb any remaining odor.
Final Touches
To finish, apply a hardwood-safe cleaner to restore the shine. Always follow the product instructions. Ensure the area is well-ventilated during the process for the best results.
Identify the Source of the Odor
First, locate the areas where the scent is strongest. My human often misses spots, so using their nose helps pinpoint trouble zones. Once found, inspect the surface closely; sometimes, the liquid seeps into cracks or under furniture.
Use a Black Light
A black light is handy for revealing hidden stains. Turn off the lights and scan the room. The UV light makes the marks glow, showing where the incident occurred. It’s a useful trick to ensure no area is overlooked.
Check for Residue
Feel for any sticky or damp areas on the wood. Residue can linger even after cleaning attempts. If surfaces still feel wet or tacky, they might need extra attention. This step is crucial to prevent future issues and ensure a fresh-smelling space.
Gather Necessary Cleaning Supplies
First, grab enzymatic cleaner specifically designed for pet messes. This will break down the odor-causing substances and help eliminate that lingering smell. Make sure it’s safe for wood surfaces; some harsh chemicals can damage the finish.
Next, have a few soft cloths or paper towels handy. These will be essential for blotting the area and soaking up any liquid residue. Choose non-abrasive materials to avoid scratching the surface.
A spray bottle can be useful for applying the cleaner evenly. If you have a steam cleaner, ensure it’s suitable for wood and can be adjusted to a low setting to avoid warping.
Additional Items
Keep baking soda on hand; it’s great for neutralizing odors. After cleaning, sprinkle it over the area and let it sit for a few hours before vacuuming. A vacuum with a pet hair attachment can help remove any remaining particles.
Lastly, consider investing in a best scratching post for cats nails. It will keep your claws occupied and away from your precious floors, reducing the chances of future accidents.
Blot the Area Immediately
As soon as you notice a mishap, grab some paper towels or a clean cloth. Gently press down on the affected spot to absorb as much liquid as possible. Don’t rub; that can spread the mess and push it deeper into the surface.
Keep applying fresh towels until they come away mostly dry. This step is vital to prevent staining and lingering odors. If the accident is on a smaller area, consider using a specialized absorbent pad for more effective results.
Once you’ve blotted, it’s a good idea to check for any remaining moisture. If you have a moisture meter, use it to ensure the area is completely dry before proceeding with further treatment.
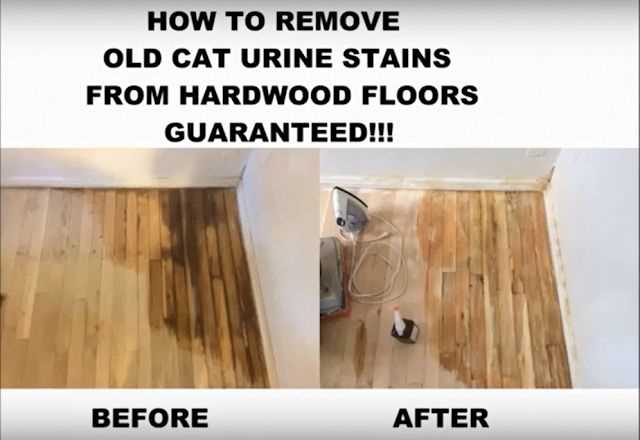
Use an Enzymatic Cleaner for Stains
Opt for an enzymatic solution to tackle stubborn marks. These products break down the compounds in the mess, neutralizing odors effectively. Look for one specifically formulated for organic substances to ensure optimal results.
Application Steps
Follow these steps for the best outcome:
| Step | Action |
|---|---|
| 1 | Apply the cleaner generously over the stained area. |
| 2 | Allow it to sit for the recommended time, usually between 10 to 15 minutes. |
| 3 | Gently scrub with a soft cloth or sponge in a circular motion. |
| 4 | Rinse with clean water and blot dry. |
Choosing the Right Product
When selecting an enzymatic cleaner, verify the ingredients. Ensure it’s safe for your environment. Read reviews to gauge its effectiveness against similar challenges. Brands that emphasize natural components often have better performance without harsh chemicals.
Rinse the Area with Water
After using an enzymatic solution, it’s crucial to rinse the affected spot with clean water. This helps to remove any remaining residue from the cleaner and dilutes the odor. Grab a clean cloth or sponge and dampen it with water, then gently blot the surface to ensure thorough rinsing.
Drying Process
Once the area is rinsed, use a dry towel to absorb excess moisture. It’s important to avoid leaving water pooled, as this can damage the wood. Allow the area to air dry completely to prevent any lingering smells.

Repeat if Necessary
If the scent persists, consider repeating the rinsing process. Sometimes multiple treatments are necessary to fully eliminate any trace of the unpleasant odor.
Dry the Floor Thoroughly
After addressing the mess, ensure the surface is dried properly to prevent any damage or lingering odors. Use a clean, dry towel or cloth to absorb excess moisture. Press firmly on the area to soak up as much liquid as possible.
For a more efficient approach, consider using a fan or a dehumidifier to expedite the drying process. Position the fan to blow air directly over the damp area, which helps to evaporate the moisture quickly. This will also minimize the risk of any potential warping or damage to the wood.
Final Touches
Once the area is dry, inspect it again for any remaining stains or odors. If necessary, repeat the cleaning steps to ensure everything is spotless. A well-maintained area not only looks better but also contributes to a healthier living environment.
Don’t forget that keeping your space tidy is important, just like choosing the best fingerprint resistant dishwasher to keep your kitchen clean and sleek. A clean home is a happy home!
Prevent Future Accidents
To keep unwanted incidents at bay, first, ensure a proper litter box setup. Place it in a quiet, accessible spot, away from high-traffic areas. Clean it regularly to maintain a pleasant environment.
Consider Multiple Litter Boxes
If your living space allows, provide more than one litter box. This reduces competition and gives me options, especially if one box is too dirty for my liking.
Monitor Stressors
Watch for changes in my surroundings that might cause stress. New pets, loud noises, or changes in routine can lead to accidents. Create a calm space where I feel safe.
- Use calming products like pheromone diffusers to ease anxiety.
- Maintain a consistent feeding and play schedule to create a routine.
Regular vet check-ups also help identify any health issues that could contribute to behavioral problems. Keeping me healthy is key to minimizing accidents.
Lastly, reward positive behavior. Treats and praise when I use the litter box reinforce good habits and make me feel appreciated.


