Regularly inspecting and maintaining the cleanliness of those delicate flaps is key to ensuring comfort and health. I suggest setting aside a few minutes each week for this task. Begin by gathering necessary items: a few cotton balls, a gentle ear-cleaning solution recommended by a veterinarian, and a cozy spot where your furry companion feels safe.
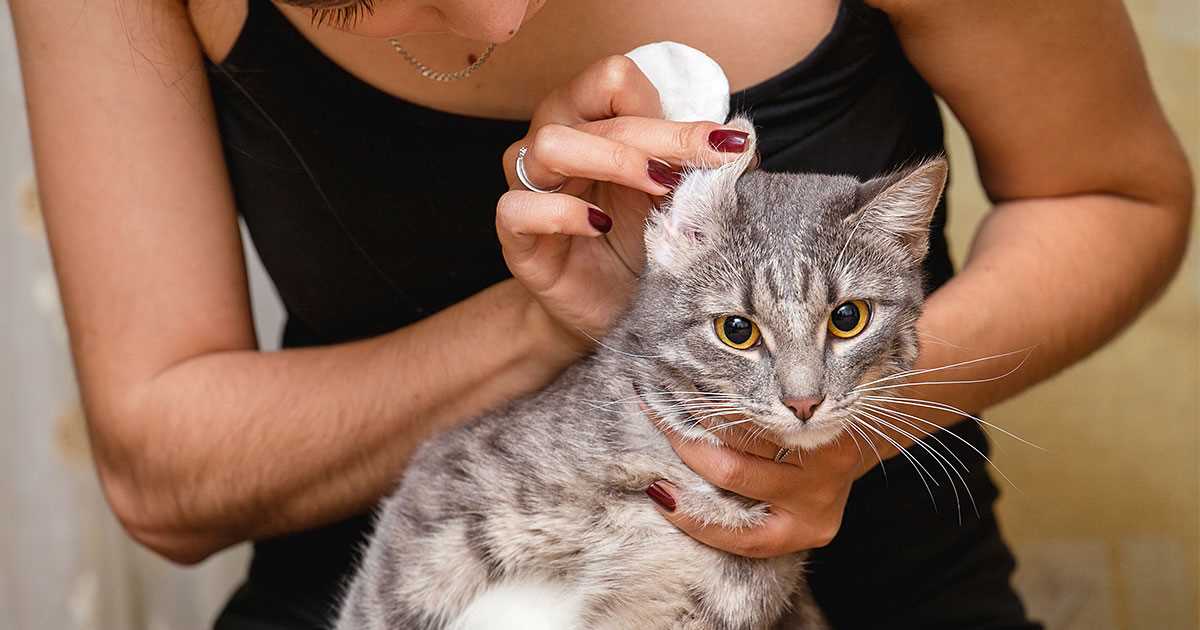
Gently hold my companion’s head steady and use a cotton ball dampened with the solution to wipe away any debris or wax. Be careful not to insert anything deep into the canal; just focus on the outer parts. A little patience is important, as some may prefer to squirm or pull away. Offering treats can help make this a more enjoyable experience.

After the gentle wipe-down, reward your pet with praise and a favorite snack. Keeping this routine light and positive can turn it into a bonding moment rather than a chore. Always consult with a veterinarian if you notice excessive buildup or signs of discomfort. By taking these steps, you’ll help maintain optimal ear hygiene for your furry friend.
Ear Maintenance Tips
Start with a gentle approach. Use a soft, damp cloth or a cotton ball lightly moistened with a vet-approved solution. Avoid inserting anything deep into the canal; it could cause harm.
Check regularly for signs of dirt or wax buildup. If you notice a strong odor, redness, or excessive scratching, consult a veterinarian. These can be signs of infections or other issues that need professional attention.
After any cleaning, reward your feline friend with treats or playtime. This creates a positive association with the process, making future sessions easier for both of us.
Keeping the air in our home clean is also important. I recommend checking out the best air purifier for cats to help maintain a fresh environment.
Staying consistent with ear checks and keeping them clean can lead to a happier, healthier life for your furry companion.
Understanding the Importance of Ear Cleaning for Cats
A regular check of my auditory passages helps prevent infections and other issues. A clean environment in this area reduces the risk of ear mites, which can cause discomfort and irritation. I’ve learned that a little attention goes a long way in maintaining my overall health.
Ignoring this part of my routine can lead to wax buildup, potentially resulting in hearing problems. Keeping these areas free from debris ensures I stay alert and aware of my surroundings. It also helps maintain my grooming standards, which is crucial for any self-respecting feline.
Being observant plays a key role. If I notice any discharge, odors, or excessive scratching, it’s a sign that something might be wrong. Early detection and timely attention can save me from unnecessary discomfort and trips to the vet.
Here’s a quick reference table outlining the signs of potential issues and what they might indicate:
| Sign | Possible Issue |
|---|---|
| Excessive scratching | Ear mites or irritation |
| Unpleasant odor | Infection or wax buildup |
| Redness or swelling | Allergic reaction or infection |
| Discharge | Infection or other underlying issues |
Regular maintenance not only prevents health issues but also ensures I feel my best. A clean space contributes to my comfort and happiness, allowing me to focus on more important matters, like napping and playing.
Gathering the Right Supplies for Ear Cleaning
First, I recommend having a quality ear cleaning solution specifically designed for felines. Look for products that are gentle yet effective, ensuring they won’t irritate sensitive skin.
A soft cotton ball or pad is ideal for applying the solution. Avoid using cotton swabs, as they can push debris further into the canal. Instead, gently wipe the outer area and any visible dirt.
Having a towel on hand is also wise. Wrapping me in it can help prevent sudden movements and keep the process more manageable. Plus, it adds a layer of comfort for both of us.
Additional Items to Consider
Consider using treats to reward good behavior. This can make the experience less stressful and more positive. A buddy to assist can also be beneficial, ensuring I feel safe and supported during the procedure.
Preparation
Before starting, ensure the room is quiet and calm. Gather everything you need in advance so that the process is smooth and efficient. A relaxed atmosphere will help make the experience more pleasant for both of us.
Step-by-Step Guide to Cleaning Your Cat’s Ears
First, ensure the area is calm. A relaxed environment helps me stay still. Place me on a flat surface, like a table or counter, where I feel secure.
Next, use a cotton ball or pad, moistened with a vet-approved solution, to gently wipe the outer part of my auditory canal. Avoid pushing it deep inside; just focus on the visible areas.
For stubborn debris, a soft, damp cloth can work wonders. Wrap it around your finger and carefully clean the crevices. This feels nice and keeps my ears tidy.
If I resist, take breaks. Patience is key. Offer me a treat afterward to create a positive association with the process.
Regular checks are beneficial. Aim for once a month to prevent buildup. If you notice excessive wax, odor, or redness, consult a veterinarian.
Identifying Signs of Ear Issues Before Cleaning
Pay attention to unusual behaviors and physical signs. If you notice frequent scratching at the side of the head or shaking motions, it might indicate discomfort. A strong odor emanating from the auditory canal can signal infection or other problems. Discoloration or excessive wax buildup also points to potential issues.
Behavioral Changes
Observe any signs of irritability or reluctance to be touched around the head area. If I start avoiding petting or seem more sensitive than usual, it could suggest something is wrong. Increased grooming of the head and ears may also indicate irritation that needs to be addressed.
Physical Symptoms
Check for redness or swelling inside the canal. If you see discharge, it might be a sign of infection. It’s important to look for any crusts or scabs that can form due to scratching. These symptoms require immediate attention, as they can worsen quickly if left untreated.
Taking note of these signs helps ensure that any cleaning process goes smoothly and safely. Always consult with a veterinarian if anything seems off.
Tips for Keeping Your Cat Calm During the Process
Utilize treats to create a positive association. Offering a favorite snack before and after the session helps me feel more relaxed.
Choose a quiet space away from loud noises. A calm environment reduces anxiety and allows for a more peaceful experience.
Wrap me in a soft towel, leaving only my head exposed. This snugness can make me feel secure and less fidgety.
Speak softly and reassuringly. Your tone can have a soothing effect, letting me know everything is fine.
Consider using a gentle, slow approach. Rushing things can make me nervous, so take your time and be patient.
Incorporate playtime before the task. Engaging in a fun activity helps me expend energy and can lead to a calmer demeanor.
Use calming pheromone sprays or diffusers. These can create a serene atmosphere, making me feel more at ease.
Have a partner assist if possible. Having someone to hold me gently while you focus on the task can provide comfort and stability.
Take breaks if I seem stressed. If I’m not cooperating, give me a moment to relax before continuing.
Be attentive to my body language. If I’m showing signs of discomfort, it’s best to pause and try again later.
When to Consult a Veterinarian About Ear Health
If you notice any unusual signs such as frequent shaking of the head, excessive scratching at the ears, or an unpleasant odor coming from the ear area, it’s time to seek veterinary advice. These symptoms could indicate infections, parasites, or other health issues that require professional attention.
Red Flags to Watch For
- Discharge that is brown, yellow, or bloody.
- Swelling or redness in the ear canal.
- Persistent scratching or rubbing of the face against objects.
- Changes in behavior, like increased irritability or withdrawal.
Steps to Take
Schedule an appointment with your veterinarian if you observe any of the above signs. They will conduct a thorough examination and may perform tests to determine the underlying cause. Early intervention can prevent further complications and ensure your furry friend stays happy and healthy.
For more information on maintaining your pet’s well-being, check out this article on how to lower general hardness in freshwater aquarium.