


Regular attention to the auditory organs is necessary for maintaining good health. Gently wiping the outer part of the pinna with a damp cloth can help remove dust and debris. Ensure the cloth is soft to avoid irritation.
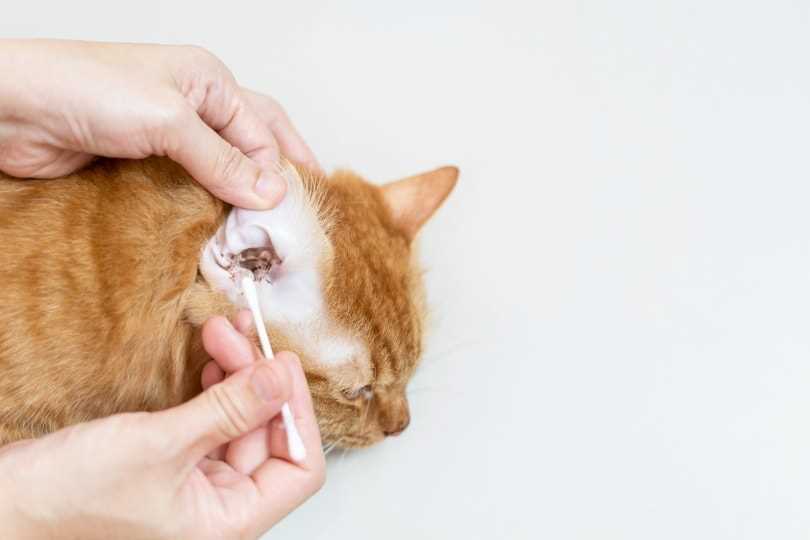
For deeper cleaning, using a veterinarian-approved solution is recommended. Apply a few drops to the inner canal, allowing the feline to shake its head afterward, which assists in dislodging any buildup. Follow this with a soft cotton ball to remove excess fluid and debris.
Always monitor for signs of discomfort or unusual discharge. If something seems off, consulting a veterinarian is the best course of action. Keeping these areas clean contributes to overall well-being and comfort.
Cleaning Recommendations for Feline Auditory Passages
It’s crucial to approach the task of maintaining auditory hygiene with care. Use a gentle, vet-approved solution specifically designed for pets. A soft, clean cotton ball or gauze works best for application. Avoid inserting anything deep into the canal to prevent injury.
Steps to Follow
1. Position yourself comfortably and have your feline friend relaxed.
2. Moisten the cotton ball with the cleaning solution.
3. Gently wipe the outer part of the auditory canal.
4. Reward your companion for cooperation.
Signs of Issues
Watch out for excessive scratching, shaking of the head, or unusual odors. These could indicate an underlying concern requiring veterinary attention.
| Signs | Action |
|---|---|
| Excessive Wax Build-Up | Consult the vet for cleaning options. |
| Odor | Schedule an examination immediately. |
| Redness or Swelling | Seek veterinary advice for treatment. |
Understanding the Anatomy of a Feline Auricle

The structure of my auditory system plays a key role in how I perceive the world. My outer ear, or pinna, is designed to capture sound waves effectively. It’s flexible and can move to direct sounds, helping me detect even the slightest rustle.
Inside, the ear canal is a short passage leading to the eardrum. This area is sensitive and lined with skin that produces wax, which serves to protect against debris and bacteria. It’s important to keep this area healthy, as blockages can lead to discomfort.
Beyond the canal, the middle ear contains three tiny bones called ossicles. These bones amplify sound vibrations before they reach the inner ear. The inner ear, home to the cochlea, converts these vibrations into signals sent to the brain, allowing me to interpret sounds accurately.
Maintaining the health of my auricle involves regular checks for any signs of irritation or infection. Observing how I react to sounds can indicate any issues. If my ears appear dirty or I show signs of discomfort, seeking help from a veterinarian is wise.
Signs That Your Feline’s Auditory Passages Require Attention
Observe for an unusual build-up of dark wax or debris inside those fluffy appendages. This can indicate an accumulation that needs to be addressed. Regular checks can help catch any issues early.
Watch out for scratching or rubbing of the head against surfaces. This behavior can signal discomfort or irritation, suggesting the need for cleaning. If I find myself frequently pawing at my ears, something might be off.
Unpleasant Odors
A strong, foul smell emanating from the auditory region is a clear sign that something isn’t right. Healthy ears shouldn’t have an odor, so any strong scent warrants a closer look.
Excessive Wax or Discharge
Any unusual discharge, whether it’s yellow, brown, or has a different color than normal, indicates a potential issue. If I spot anything that seems out of the ordinary, it’s time to take action.
Safe Methods for Cleaning Your Feline’s Auricles
Using a gentle approach is key. Here’s how I prefer to keep my hearing organs pristine:
- Gather Supplies: Use a soft cotton ball or pad, a vet-recommended ear cleaner, and treats for positive reinforcement.
- Positioning: Have someone hold me comfortably. This helps me relax while ensuring I stay still.
- Apply Cleaner: Moisten the cotton with the cleaner. Avoid soaking it; a little goes a long way.
- Wipe Gently: Carefully wipe the visible parts of my ears. Avoid deep insertion into the canal.
- Reward Time: After the session, give a treat. This makes future cleanings much easier.
Regular checks can prevent buildup. If I show signs of discomfort or excessive wax, consult a vet. Keeping my space tidy, including using a best absorbent door mat for dogs, helps maintain cleanliness at home.
Common Mistakes to Avoid When Cleaning Ears
Using cotton swabs is a frequent error. They can push debris further inside, causing blockages. Instead, opt for a soft cloth or a specialized ear wipe. Always approach gently, without excessive force.
Neglecting to check for signs of infection is another pitfall. If there’s redness, swelling, or unusual discharge, it’s best to consult a vet before attempting any cleaning. Ignoring these symptoms can lead to worsening conditions.
Overcleaning
Applying cleaning solutions too often can strip natural oils, leading to dryness and irritation. Establish a routine based on personal needs, typically every few weeks, unless advised otherwise by a veterinarian.
Using Harsh Chemicals
Household cleaners are not safe. Stick to products specifically designed for ear hygiene in pets. Harsh substances can cause irritation, allergic reactions, or more severe damage.
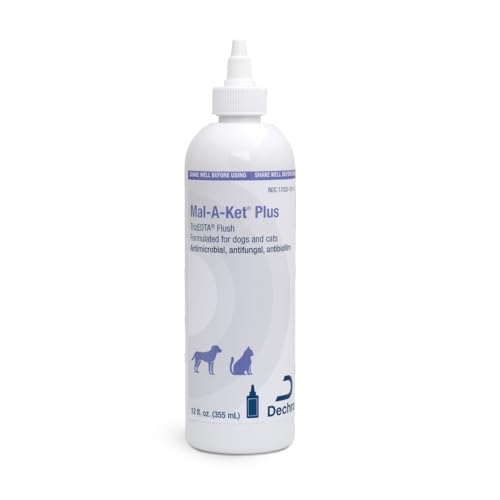
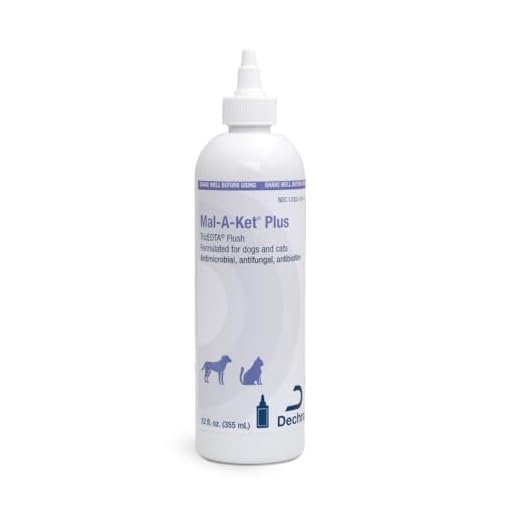
Choosing the Right Products for Ear Cleaning
For the best results, opt for a vet-recommended ear cleanser specifically designed for felines. These solutions typically contain gentle ingredients that break down wax and debris without causing irritation. Always avoid alcohol-based products, as they can lead to discomfort or dryness.
Look for solutions that include soothing agents like aloe vera or witch hazel, which help calm the skin inside the auditory canal. Additionally, consider using cotton balls or pads for application, as they are soft and won’t scratch delicate surfaces.
Some feline-friendly products come with applicator tips, making it easier to reach deeper areas without excessive pressure. Always follow the instructions provided on the packaging and consult a veterinarian if unsure about a particular product.
Check for any specific allergens or sensitivities your furry friend may have before selecting a cleaning solution. Regularly inspect the product for expiration dates to ensure safety and efficacy. With the right supplies, maintaining ear hygiene becomes a straightforward task.
When to Consult a Veterinarian About Ear Health
If any unusual symptoms arise, seeking veterinary advice is crucial. If I notice persistent scratching, shaking of the head, or discharge from the auditory canals, these may indicate an underlying issue that requires professional assessment.
In case of foul odors emanating from the ear area, it’s wise to consult a vet. This odor often points to infections or other conditions needing immediate attention. Redness or swelling around the ear flap is another sign that warrants a visit to the clinic.
Excessive wax buildup can also be problematic. While some cleaning at home is acceptable, continuous accumulation indicates a need for a professional approach. Regular check-ups can help prevent complications, ensuring overall ear health.
For cats with a history of ear issues or those with allergies, monitoring their ear health closely is essential. If changes occur or if there’s any uncertainty, don’t hesitate to reach out to a veterinarian. Remember, early intervention can prevent more severe problems down the line.
Additionally, maintaining a balanced diet contributes to overall health, including ear well-being. For instance, dry cat food for cats that vomit excessively can help in managing dietary sensitivities that might affect ear conditions.
FAQ:
Is it safe to clean my cat’s ears?
Yes, cleaning your cat’s ears can be safe, provided you do it correctly. Use a vet-recommended ear cleaner and avoid using cotton swabs, as they can push debris further into the ear canal. If you’re unsure, consult your veterinarian for guidance on the proper technique and frequency.
How often should I clean my cat’s ears?
The frequency of cleaning your cat’s ears depends on the individual cat. Some cats may require cleaning every few weeks, while others may only need it a few times a year. Regular checks for dirt or wax buildup can help you determine when cleaning is necessary. If you notice any unusual odor, discharge, or signs of discomfort, consult your vet.
What signs indicate that my cat’s ears need cleaning?
There are several signs that your cat’s ears may need attention. Look for excessive wax buildup, dirt, or a strong odor. Additionally, if your cat is frequently scratching at its ears or shaking its head, these could be signs of irritation or infection, suggesting that a cleaning is in order. If these symptoms persist, it’s best to seek veterinary advice.
Can I use human ear cleaning products on my cat?
No, you should not use human ear cleaning products on your cat. These products may contain ingredients that are harmful to pets. It’s best to use a product specifically formulated for cats, as these will be safe and effective for their unique ear structure. Always consult with your veterinarian for recommendations on suitable ear cleaning solutions.
What is the best way to clean my cat’s ears at home?
To clean your cat’s ears at home, first gather the necessary supplies: a vet-approved ear cleaner, cotton balls, and possibly treats to reward your cat. Gently hold your cat and apply a few drops of the cleaner into the ear canal, massaging the base of the ear to help loosen debris. Allow your cat to shake its head, then wipe away any excess with a cotton ball. Always be gentle, and if your cat seems distressed, stop and try again later. If you’re uncertain, your veterinarian can demonstrate the proper technique.


