


First, grab some paper towels and press them firmly onto the stained area. This helps absorb as much liquid as possible. Don’t rub; just blot gently. After that, mix a solution of equal parts white vinegar and water in a spray bottle. Spray the mixture onto the spot and let it sit for a few minutes. The vinegar neutralizes odors and breaks down the stain.
Next, sprinkle baking soda generously over the treated area. This will help absorb any lingering smells. Leave it for several hours or overnight if possible. Once it’s dry, vacuum the area thoroughly to remove the baking soda.
If the stain persists, consider using an enzymatic cleaner specifically designed for these types of messes. Follow the instructions on the product for best results. Make sure to test it on a small, inconspicuous section of your flooring first to ensure it won’t cause damage.
Removing Unwanted Odors from Textiles
First, grab some baking soda. Sprinkle it generously over the affected area. This will help absorb any lingering scents.
Next, mix equal parts white vinegar and water in a spray bottle. Lightly mist the area, but avoid soaking it. Let it sit for about 10 minutes to penetrate the fibers.
After that, blot the area with a clean cloth or paper towel. Press firmly to soak up the liquid, but don’t rub; just dab to avoid damaging the fibers.
Once the area feels dry, apply another layer of baking soda. Leave it for several hours or overnight if possible. This step will further neutralize any unpleasant aromas.
Finally, vacuum up the baking soda. If any scent remains, repeat the vinegar and water treatment. It may take a few tries, but persistence pays off.
Remember, always test any solution on a small inconspicuous area first to ensure it doesn’t discolor or damage the fabric.
Identify the Affected Area
First, locate the spot where the issue occurred. Check for any discoloration or dampness on the surface. Use your nose; that distinctive odor can lead you directly to the source. If the area feels moist, it’s likely still contaminated.
To ensure accuracy, use a black light in a dark room. This will reveal any hidden stains that aren’t visible under normal lighting conditions, making it easier to address the problem thoroughly.
Once identified, mark the area with tape or a small object to avoid missing it while gathering cleaning supplies. If the stain has penetrated deeper into the fibers, be prepared to treat a larger area than initially apparent.
For effective results, consider using the best pressure washer concentrate for any stubborn remnants, ensuring a more thorough approach to restoration.
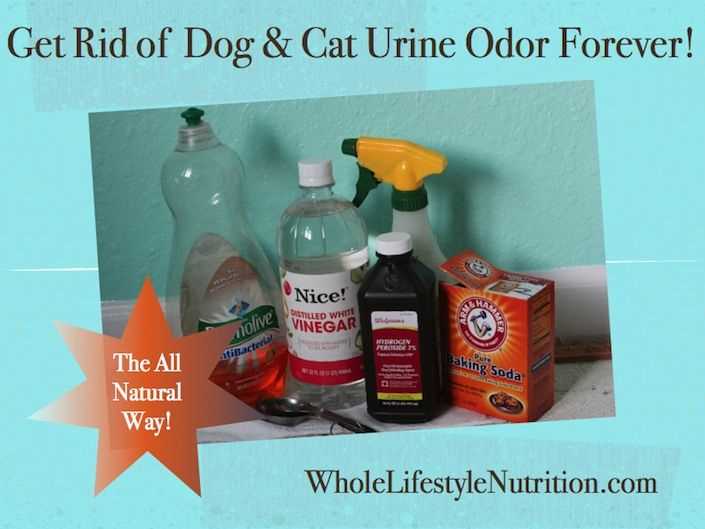
Gather Necessary Cleaning Supplies

For tackling those stubborn spots, I recommend having the following materials handy:
Cleaning Agents

| Supply | Purpose |
|---|---|
| White Vinegar | Neutralizes odors and breaks down stains. |
| Baking Soda | Absorbs moisture and eliminates lingering smells. |
| Dish Soap | Helps lift stains without damaging fibers. |
| Hydrogen Peroxide | Acts as a disinfectant and stain remover. |
Tools and Equipment
| Supply | Purpose |
|---|---|
| Spray Bottle | For easy application of solutions. |
| Paper Towels | To blot and absorb liquids. |
| Soft Brush | To gently scrub affected areas. |
| Bucket | For mixing cleaning solutions. |
Gather these items before getting started for the best results!
Blotting the Stain Immediately
As soon as you notice the unwanted mark, grab some clean paper towels or an absorbent cloth. Press firmly on the affected area to soak up as much liquid as possible. Avoid rubbing, as this can spread the stain further into the fibers.
Change the towels frequently until no more moisture is being absorbed. This initial step is crucial to prevent deeper penetration and lingering odors. After blotting, you may want to use a solution specifically designed for odor removal. For those who want to keep spaces free from future incidents, consider checking out the best under bed blocker for cats to create a safer environment.
Follow-Up Action
Once the majority of the liquid is absorbed, it’s time to treat the area with appropriate cleaning solutions. Always test any product on a small, inconspicuous spot first. After applying the cleaner, continue blotting until the stain is fully treated.
Applying Cleaning Solutions
For effective treatment, choose a suitable cleaning solution based on the type of fibers in the flooring. A mixture of white vinegar and water works well for most fabrics. Combine equal parts of each in a spray bottle. Apply it directly to the stained area without soaking it.
Alternative Solutions
If the vinegar blend doesn’t do the trick, consider enzymatic cleaners designed for organic stains. These products break down the compounds causing odor and discoloration. Follow the instructions, applying it liberally to the affected spot. Allow it to sit for the recommended time to ensure maximum effectiveness.
Final Rinse
After the cleaning agent has had time to work, blot the area with a clean cloth to absorb excess moisture. Rinse the area with plain water and blot again to remove any remaining residue. This step helps prevent any lingering scents, ensuring my space remains fresh.
Rinsing and Drying the Rug
After treating the stain, it’s crucial to rinse the area thoroughly to remove any residual cleaning agents. Use a clean sponge or cloth soaked in lukewarm water, gently dabbing the affected section to lift out remaining solutions. Avoid saturating the fibers, as excessive moisture can lead to mold or mildew.
Effective Rinsing Techniques
Make sure to work from the outer edges of the spot towards the center to prevent spreading. Repeat this process until the water runs clear. If a specific cleaning solution was used, check its instructions to ensure compatibility with rinsing. After rinsing, take a dry towel and press down firmly to absorb as much liquid as possible.
Drying Procedures
Once the area is rinsed, drying is next. Lay a clean, dry towel over the damp spot and apply pressure to soak up moisture. For faster drying, utilize a fan or open windows to improve airflow. Avoid using heat sources directly on the material, as this may cause damage or shrinkage. Ensure the area is completely dry before allowing foot traffic or returning furniture.
Preventing Future Accidents
Ensure my litter box is always clean and accessible. I appreciate having a tidy spot to do my business, so regular scooping is key. If it’s too dirty, I might seek alternative places.
Consider the location of the litter box. Place it in a quiet, low-traffic area away from my food and water. This gives me the privacy I need, making me more comfortable.
Introduce different types of litter. I might prefer a specific texture or scent, so experimenting can lead to better habits. If I’m not happy with what’s available, I may protest.
Regular Vet Check-ups
Keep up with my health by visiting the vet regularly. Any issues with my urinary tract or other conditions can lead to accidents. Early detection is important, so don’t skip those appointments!
Positive Reinforcement
Reward me when I use the litter box correctly! A little praise or a treat goes a long way in reinforcing good behavior. Let me know that I’m doing the right thing, and I’ll be more likely to repeat it.


