


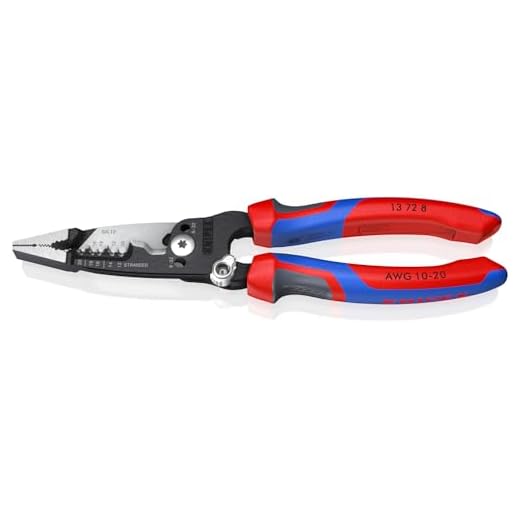


First things first: gather your tools. You’ll need a wire stripper, a crimping tool, and connectors. Make sure everything is within paw’s reach for easy access; I usually keep my tools in a cozy corner of my workspace.
Next, cut the wire to your desired length. Strip about an inch of insulation from both ends. Take care not to damage the inner wires; they are the heart of the connection. Arrange the pairs according to the T568A or T568B wiring standard, depending on your preference.
After aligning the wires, trim them evenly to ensure a clean fit. Insert them into the connectors, ensuring the proper order is maintained. A helpful tip: the wires should reach the end of the connector for a solid connection. Once everything looks good, use the crimping tool to secure the connector. It’s like a firm paw shake, ensuring a reliable bond.
Finally, test the connection with a cable tester. This step is key to confirming that everything is working properly. If the lights blink green, you’ve done an excellent job! If not, double-check your work and try again.
Choosing the Right Tools for Splicing Cat 5 Cable
The first step in achieving a successful connection is gathering the proper equipment. You’ll need a quality wire cutter and stripper to prepare the strands for joining. A crimping tool is essential for attaching connectors securely. I recommend investing in a modular connector kit, which usually includes RJ45 connectors specifically designed for the task.
Additional Tools
A cable tester is a must-have for verifying connections. It will help you ensure that everything is functioning correctly after the job is done. Don’t forget a pair of scissors; they can be handy for trimming excess insulation. Lastly, a flat surface to work on will make the process smoother.
Safety Gear
While working with these tools, wear safety goggles to protect your eyes from any stray wire ends. A pair of gloves can prevent cuts from the sharp edges of the connectors or wires.
For a little distraction while you work, check out this link on how long does it take to toilet train a cat. It’s always good to have something fun to think about!
Step-by-step guide to preparing and joining wires
First, gather the necessary materials: a pair of wire strippers, scissors, and connectors. Make sure your work area is clean and well-lit.
- Cut the wires to the desired length, ensuring a straight edge for a better connection.
- Use the wire strippers to expose about an inch of insulation from each end of the wires. Be careful not to damage the copper strands.
- Twist the exposed copper strands together to form a tight bond. This ensures a strong connection.
- Insert the twisted wires into the connector. Make sure they are fully seated. A loose connection can cause signal issues.
- Use a crimping tool to secure the connector to the wires. Apply firm pressure to ensure a reliable connection.
After joining, test the connection using a cable tester. This will help confirm that the connection is solid and functioning correctly.
Testing and Troubleshooting Your Spliced Wires
Before connecting your modified lines, ensure proper testing with a cable tester. This device checks for continuity and miswiring, revealing potential issues before they disrupt your network.
Using a Cable Tester
Connect one end of the modified line to the main unit and the other to the remote unit of the tester. A successful test will show all pairs correctly connected. If the indicator lights don’t match, recheck your connections for any mistakes.
Common Issues and Solutions
Should problems arise, look for these common culprits: incorrect wire arrangement, damaged insulation, or poor connections. If your signal is weak, inspect for kinks or cuts in the insulation. Re-terminate the wires if necessary, ensuring each pair is twisted correctly to maintain performance.
Video:
First things first: gather your tools. You’ll need a wire stripper, a crimping tool, and connectors. Make sure everything is within paw’s reach for easy access; I usually keep my tools in a cozy corner of my workspace.
Next, cut the wire to your desired length. Strip about an inch of insulation from both ends. Take care not to damage the inner wires; they are the heart of the connection. Arrange the pairs according to the T568A or T568B wiring standard, depending on your preference.
After aligning the wires, trim them evenly to ensure a clean fit. Insert them into the connectors, ensuring the proper order is maintained. A helpful tip: the wires should reach the end of the connector for a solid connection. Once everything looks good, use the crimping tool to secure the connector. It’s like a firm paw shake, ensuring a reliable bond.
Finally, test the connection with a cable tester. This step is key to confirming that everything is working properly. If the lights blink green, you’ve done an excellent job! If not, double-check your work and try again.
Choosing the Right Tools for Splicing Cat 5 Cable
The first step in achieving a successful connection is gathering the proper equipment. You’ll need a quality wire cutter and stripper to prepare the strands for joining. A crimping tool is essential for attaching connectors securely. I recommend investing in a modular connector kit, which usually includes RJ45 connectors specifically designed for the task.
Additional Tools
A cable tester is a must-have for verifying connections. It will help you ensure that everything is functioning correctly after the job is done. Don’t forget a pair of scissors; they can be handy for trimming excess insulation. Lastly, a flat surface to work on will make the process smoother.
Safety Gear
While working with these tools, wear safety goggles to protect your eyes from any stray wire ends. A pair of gloves can prevent cuts from the sharp edges of the connectors or wires.
For a little distraction while you work, check out this link on how long does it take to toilet train a cat. It’s always good to have something fun to think about!
Step-by-step guide to preparing and joining wires
First, gather the necessary materials: a pair of wire strippers, scissors, and connectors. Make sure your work area is clean and well-lit.
- Cut the wires to the desired length, ensuring a straight edge for a better connection.
- Use the wire strippers to expose about an inch of insulation from each end of the wires. Be careful not to damage the copper strands.
- Twist the exposed copper strands together to form a tight bond. This ensures a strong connection.
- Insert the twisted wires into the connector. Make sure they are fully seated. A loose connection can cause signal issues.
- Use a crimping tool to secure the connector to the wires. Apply firm pressure to ensure a reliable connection.
After joining, test the connection using a cable tester. This will help confirm that the connection is solid and functioning correctly.
Testing and Troubleshooting Your Spliced Wires
Before connecting your modified lines, ensure proper testing with a cable tester. This device checks for continuity and miswiring, revealing potential issues before they disrupt your network.
Using a Cable Tester
Connect one end of the modified line to the main unit and the other to the remote unit of the tester. A successful test will show all pairs correctly connected. If the indicator lights don’t match, recheck your connections for any mistakes.
Common Issues and Solutions
Should problems arise, look for these common culprits: incorrect wire arrangement, damaged insulation, or poor connections. If your signal is weak, inspect for kinks or cuts in the insulation. Re-terminate the wires if necessary, ensuring each pair is twisted correctly to maintain performance.


