Start with a bundle of flexible wires in various colors. Choose a shade that resonates with your vision for the furry friend. Cut several lengths–around 12 inches should suffice for crafting the body and limbs.
Begin forming the core structure by bending one piece into a loop for the torso. Secure it by twisting the ends together. For the legs, take four shorter lengths and shape them into simple stick-like forms, attaching them to the body with careful twists.
Next, focus on the head. A smaller piece will work to create a rounded shape. Bend it into a circle and attach it to the top of the torso. Don’t forget to add ears! Cut two small segments and fold them into triangular shapes, then affix them to the head.
Finally, add details. Use tiny bits of material for the eyes and a small piece for the nose. You can even create a tail by twisting another piece and attaching it to the back. This playful figure is now ready to bring joy and charm to your space!
Choosing the Right Colors and Materials for Your Feline Creation
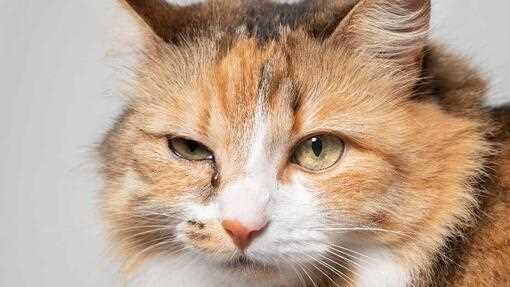
For any feline figure, choosing the right hues is key. Bright shades like orange, gray, and black bring life to the design. Consider mixing light and dark tones for depth. A splash of white can highlight features such as paws or a tail, adding contrast.
Quality of materials matters too. Opt for soft, flexible strands that hold their shape but are easy to manipulate. Fabrics like felt can enhance texture, making the creation more inviting. Stick with non-toxic options to ensure safety and durability, especially if a child will be involved in crafting.
Incorporating embellishments like googly eyes, sequins, or small beads can add personality. Choose colors that complement the main body tones. For instance, if using a gray base, bright green or blue accents can make the character pop.
Think about seasonal themes as well. For Halloween, black and orange are perfect, while spring might inspire pastel colors. This adds a fun twist and makes the creation relevant throughout the year.
Step-by-Step Guide to Shaping the Body and Head
Begin with a long piece of flexible wire for the body. Bend it into a U-shape, ensuring the ends are equal in length. This will form the torso. For stability, twist the wire several times at the bottom, giving it a sturdy base.
Next, shape the head using a smaller piece of wire. Create a rounded shape, making sure to leave enough length for the neck. Attach this to the top of the torso by twisting the ends securely. This helps to maintain the overall structure.
To form the ears, cut two small segments of wire and bend them into triangular shapes. Attach them to the top of the head, twisting securely for a firm hold. Adjust their angle for a more realistic appearance.
For facial features, use small beads or additional segments of wire to create eyes and a nose. Position them carefully, ensuring they are balanced and proportionate to the head size.
Don’t forget about the tail! Take another piece of wire, shape it into a long, curved form, and attach it to the back of the torso. This adds character and completes the look.
As you create your figure, make sure to check for stability and adjust any loose parts. If you find any troublesome areas, consider looking into how to stop your cat from scratching the sofa for tips on maintaining a clean workspace!
Adding Details: Eyes, Whiskers, and Tail Techniques
For realistic eyes, use small beads or buttons. Black beads can serve as pupils, while lighter colors can represent the iris. Position them at an angle to mimic a playful glance.
Whiskers can be created with thin, flexible wires. Cut them into various lengths and attach them to the snout area, ensuring they fan out naturally. This adds a dynamic touch to the facial features.

For the tail, begin with a longer piece. Shape it by twisting and bending to create a curve, which mirrors the natural posture of a feline. To add volume, consider wrapping another piece around it, giving it a fuller look.
Experiment with different techniques, like looping the tail for a more whimsical look or tapering it for elegance. These small touches bring personality and flair to your creation.
Start with a bundle of flexible wires in various colors. Choose a shade that resonates with your vision for the furry friend. Cut several lengths–around 12 inches should suffice for crafting the body and limbs.
Begin forming the core structure by bending one piece into a loop for the torso. Secure it by twisting the ends together. For the legs, take four shorter lengths and shape them into simple stick-like forms, attaching them to the body with careful twists.
Next, focus on the head. A smaller piece will work to create a rounded shape. Bend it into a circle and attach it to the top of the torso. Don’t forget to add ears! Cut two small segments and fold them into triangular shapes, then affix them to the head.
Finally, add details. Use tiny bits of material for the eyes and a small piece for the nose. You can even create a tail by twisting another piece and attaching it to the back. This playful figure is now ready to bring joy and charm to your space!
Choosing the Right Colors and Materials for Your Feline Creation
For any feline figure, choosing the right hues is key. Bright shades like orange, gray, and black bring life to the design. Consider mixing light and dark tones for depth. A splash of white can highlight features such as paws or a tail, adding contrast.
Quality of materials matters too. Opt for soft, flexible strands that hold their shape but are easy to manipulate. Fabrics like felt can enhance texture, making the creation more inviting. Stick with non-toxic options to ensure safety and durability, especially if a child will be involved in crafting.
Incorporating embellishments like googly eyes, sequins, or small beads can add personality. Choose colors that complement the main body tones. For instance, if using a gray base, bright green or blue accents can make the character pop.
Think about seasonal themes as well. For Halloween, black and orange are perfect, while spring might inspire pastel colors. This adds a fun twist and makes the creation relevant throughout the year.
Step-by-Step Guide to Shaping the Body and Head
Begin with a long piece of flexible wire for the body. Bend it into a U-shape, ensuring the ends are equal in length. This will form the torso. For stability, twist the wire several times at the bottom, giving it a sturdy base.
Next, shape the head using a smaller piece of wire. Create a rounded shape, making sure to leave enough length for the neck. Attach this to the top of the torso by twisting the ends securely. This helps to maintain the overall structure.
To form the ears, cut two small segments of wire and bend them into triangular shapes. Attach them to the top of the head, twisting securely for a firm hold. Adjust their angle for a more realistic appearance.
For facial features, use small beads or additional segments of wire to create eyes and a nose. Position them carefully, ensuring they are balanced and proportionate to the head size.
Don’t forget about the tail! Take another piece of wire, shape it into a long, curved form, and attach it to the back of the torso. This adds character and completes the look.
As you create your figure, make sure to check for stability and adjust any loose parts. If you find any troublesome areas, consider looking into how to stop your cat from scratching the sofa for tips on maintaining a clean workspace!
Adding Details: Eyes, Whiskers, and Tail Techniques
For realistic eyes, use small beads or buttons. Black beads can serve as pupils, while lighter colors can represent the iris. Position them at an angle to mimic a playful glance.
Whiskers can be created with thin, flexible wires. Cut them into various lengths and attach them to the snout area, ensuring they fan out naturally. This adds a dynamic touch to the facial features.
For the tail, begin with a longer piece. Shape it by twisting and bending to create a curve, which mirrors the natural posture of a feline. To add volume, consider wrapping another piece around it, giving it a fuller look.
Experiment with different techniques, like looping the tail for a more whimsical look or tapering it for elegance. These small touches bring personality and flair to your creation.