
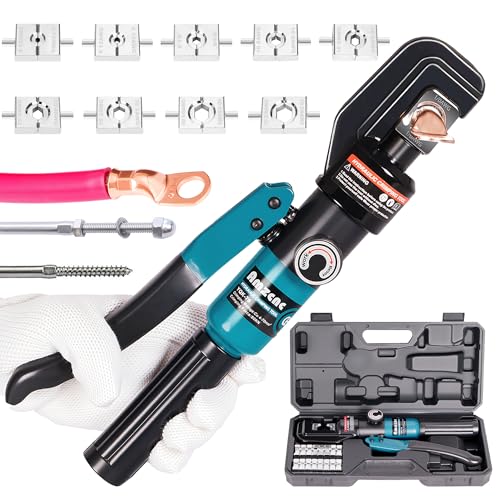


First, gather the necessary tools: a crimping tool, RJ45 connectors, and a length of U/FTP wire. Cut the wire to your desired length, ensuring it’s long enough for your setup without excess slack.
Next, strip about an inch of the outer jacket from both ends of the wire. Be careful not to damage the inner pairs. Inside, you’ll find four twisted pairs of wires, typically color-coded. Untwist them and align them according to the T568B wiring standard: Orange/White, Orange, Green/White, Blue, Blue/White, Green, Brown/White, and Brown.
After arranging the wires, trim them to ensure they are even and insert them into the RJ45 connector. Use the crimping tool to secure the connector onto the wire, ensuring a solid connection. Repeat this process for the other end, and your custom Ethernet connection is ready for use.
Preparing the Tools and Materials for Your Cat 5e Cable
Gathering the right tools and materials is crucial. You’ll need a quality Ethernet cable, typically with four twisted pairs of wires. Ensure you have a cable stripper to remove the outer jacket without damaging the internal wires.
A punch-down tool is essential for connecting the wires to the connectors securely. You will also require RJ-45 connectors, which are standard for Ethernet connections. Don’t forget to grab a crimping tool; it’s used to attach the connectors to the cable ends.
For testing the finished product, a cable tester will help verify that the connections are correct and functioning properly. Lastly, having a pair of scissors or wire cutters can assist in trimming any excess cable length.
If you’re interested in keeping your feline friend from snacking on human food while you work, consider checking out how to stop cats from eating human food.
Step-by-step process for wiring and terminating the cable
Start with stripping off about 1 inch of the outer insulation from both ends of the wire using the wire stripper. Be careful not to damage the inner pairs.
Next, untwist the pairs of wires carefully. Align them according to the T568B wiring standard: white-orange, orange, white-green, blue, white-blue, green, white-brown, brown.
Once aligned, trim the wires to about half an inch in length to ensure they fit snugly into the connector.
Inserting Wires into Connectors
Insert the wires into the RJ45 connector, ensuring each wire goes all the way to the end. The plastic tab should be facing you.
Check that the order is maintained as you insert each wire. A slight pull on the wires can ensure they are secure.
Crimping the Connector
Using the crimping tool, firmly press down on the connector. This action secures the wires in place and ensures a good connection.
Repeat these steps for the other end of your wire, maintaining the same wiring order. Once completed, test the connection with a cable tester to confirm proper wiring.
After verifying, your assembly is ready for use!
Testing and Troubleshooting Your Completed 5e Connection
First, grab a cable tester. This nifty gadget will help identify if the wires are connected correctly. Plug one end of the connection into the tester’s main unit and the other into the remote unit. If all lights light up in sequence, congratulations! You’ve done it right!
If the tester shows a failure, check the following: ensure that the wires in both ends are in the correct order according to the T568A or T568B standard. A common mistake is mixing up the color codes. The pairs should be twisted together until they reach the connectors to minimize interference.
Next, inspect the connectors. Make sure the wires are pushed all the way into the connectors. If they are not, you might experience connectivity issues. If you see any strands from the wires sticking out, that’s a sign to re-terminate the end.
In case your connection still doesn’t work after testing, try plugging it into a different device or port. This can help determine if the issue lies with the wiring or the equipment. If possible, test with another known working connection to rule out equipment failure.
Lastly, consider visual inspection. Look for any visible damage to the outer sheath of the wire. If there are any cuts or kinks, it might lead to performance issues. Replace any damaged sections as needed.
First, gather the necessary tools: a crimping tool, RJ45 connectors, and a length of U/FTP wire. Cut the wire to your desired length, ensuring it’s long enough for your setup without excess slack.
Next, strip about an inch of the outer jacket from both ends of the wire. Be careful not to damage the inner pairs. Inside, you’ll find four twisted pairs of wires, typically color-coded. Untwist them and align them according to the T568B wiring standard: Orange/White, Orange, Green/White, Blue, Blue/White, Green, Brown/White, and Brown.
After arranging the wires, trim them to ensure they are even and insert them into the RJ45 connector. Use the crimping tool to secure the connector onto the wire, ensuring a solid connection. Repeat this process for the other end, and your custom Ethernet connection is ready for use.
Preparing the Tools and Materials for Your Cat 5e Cable
Gathering the right tools and materials is crucial. You’ll need a quality Ethernet cable, typically with four twisted pairs of wires. Ensure you have a cable stripper to remove the outer jacket without damaging the internal wires.
A punch-down tool is essential for connecting the wires to the connectors securely. You will also require RJ-45 connectors, which are standard for Ethernet connections. Don’t forget to grab a crimping tool; it’s used to attach the connectors to the cable ends.
For testing the finished product, a cable tester will help verify that the connections are correct and functioning properly. Lastly, having a pair of scissors or wire cutters can assist in trimming any excess cable length.
If you’re interested in keeping your feline friend from snacking on human food while you work, consider checking out how to stop cats from eating human food.
Step-by-step process for wiring and terminating the cable
Start with stripping off about 1 inch of the outer insulation from both ends of the wire using the wire stripper. Be careful not to damage the inner pairs.
Next, untwist the pairs of wires carefully. Align them according to the T568B wiring standard: white-orange, orange, white-green, blue, white-blue, green, white-brown, brown.
Once aligned, trim the wires to about half an inch in length to ensure they fit snugly into the connector.
Inserting Wires into Connectors
Insert the wires into the RJ45 connector, ensuring each wire goes all the way to the end. The plastic tab should be facing you.
Check that the order is maintained as you insert each wire. A slight pull on the wires can ensure they are secure.
Crimping the Connector
Using the crimping tool, firmly press down on the connector. This action secures the wires in place and ensures a good connection.

Repeat these steps for the other end of your wire, maintaining the same wiring order. Once completed, test the connection with a cable tester to confirm proper wiring.
After verifying, your assembly is ready for use!
Testing and Troubleshooting Your Completed 5e Connection
First, grab a cable tester. This nifty gadget will help identify if the wires are connected correctly. Plug one end of the connection into the tester’s main unit and the other into the remote unit. If all lights light up in sequence, congratulations! You’ve done it right!
If the tester shows a failure, check the following: ensure that the wires in both ends are in the correct order according to the T568A or T568B standard. A common mistake is mixing up the color codes. The pairs should be twisted together until they reach the connectors to minimize interference.
Next, inspect the connectors. Make sure the wires are pushed all the way into the connectors. If they are not, you might experience connectivity issues. If you see any strands from the wires sticking out, that’s a sign to re-terminate the end.
In case your connection still doesn’t work after testing, try plugging it into a different device or port. This can help determine if the issue lies with the wiring or the equipment. If possible, test with another known working connection to rule out equipment failure.
Lastly, consider visual inspection. Look for any visible damage to the outer sheath of the wire. If there are any cuts or kinks, it might lead to performance issues. Replace any damaged sections as needed.


