


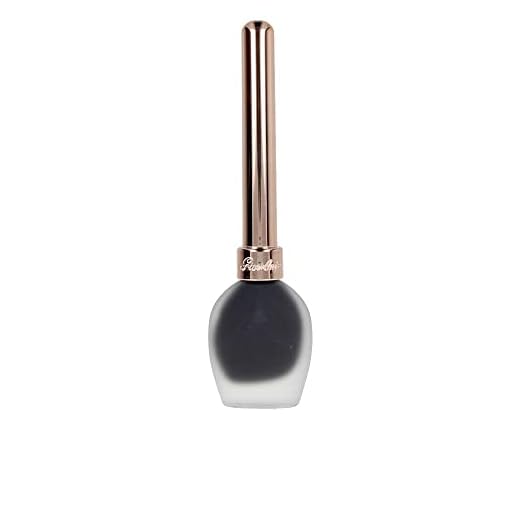
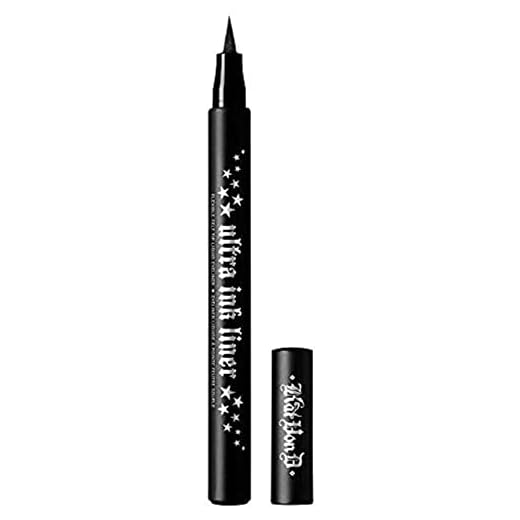
To achieve that striking, feline-inspired look, begin with a quality liquid or gel product that glides smoothly across your lids. The right tool can make all the difference; a fine-tipped brush or a felt-tip applicator offers precision for those sharp lines you want.
Position yourself in front of a well-lit mirror, ensuring the area is bright enough to see every detail. Start at the inner corner of your lid, applying a thin line along the lash line. Gradually thicken the line as you move outward, angling it slightly upward towards the outer edge. This upward flick is key to creating that alluring lift.
Once the base is laid down, it’s time for the flick. Visualize a line extending from your lower lash line; this will guide your upward stroke. Keep it subtle and angled for a natural yet striking effect. If you make a mistake, don’t worry–just use a cotton swab dipped in makeup remover to clean up any imperfections.
Finish with a coat of mascara to enhance your lashes, giving your look the final touch. This technique not only enhances your natural beauty but also brings out the playful spirit of a feline friend.
Creating a Striking Feline Look
To achieve that alluring feline appearance, begin with a well-defined line along the upper lash. Use a liquid or gel formula for precision. Start at the inner corner, gently flicking the applicator towards the outer edge. Aim for a slight upward angle at the finish to mimic the natural lift of a cat’s features.
Add Depth with a Wing
Once the initial line is established, extend it outward to form a wing. This section should be thicker than the base line, tapering as it moves towards the tip. For a seamless transition, smudge lightly with a brush or your fingertip for a softer effect. Ensure both sides are symmetrical by checking in a mirror frequently.
<h3.Finish with a Pop of Color
For an extra dimension, consider applying a complementary shade on the lower lash line. A subtle hue can enhance the overall look, making those peepers stand out. Don’t forget to curl your lashes and add mascara for a finishing touch, amplifying the dramatic effect of this makeup style.
Choosing the Right Eyeliner for Cat Eyes
For achieving that perfect look, I recommend liquid formulas. They offer precision and a sleek finish. Gel variants are another great option, providing a smooth glide while allowing for easy blending.
Consider the brush type; a fine-tipped applicator is ideal for sharp lines. If you prefer a softer appearance, a pencil can create a more natural effect. Waterproof options are fantastic for longevity, ensuring your masterpiece stays intact throughout the day.
Color choice plays a significant role as well. Classic black is timeless, but experimenting with dark greens or browns can add depth. Don’t shy away from metallics for a touch of glamour.
Always test the product on your skin before committing. This way, you can find the perfect match for your unique fur and skin tone. Remember, the right tools will make all the difference in your artistic endeavors!
Step-by-Step Guide to Creating the Perfect Wing
Begin with a clean and primed eyelid to ensure longevity. Choose a gel or liquid formulation for precision. Start at the inner corner and draw a thin line along the lash line, gradually thickening it as you reach the outer corner.
Creating the Wing
To form the wing, imagine a line extending from the lower lash line towards the end of your eyebrow. Use this as a guide. From the outer corner, flick the applicator upward to create the desired angle. Connect this flick back to the lash line, filling in any gaps for a seamless look. Adjust the thickness to match your preference.
Final Touches
Once satisfied with the shape, make sure both sides are symmetrical. For a clean finish, use a cotton swab dipped in makeup remover to tidy up any mistakes. Don’t forget to check for any irritation, especially if you’re curious about what products are safe around pets, like are mothballs toxic to cats.
Tips for Achieving Symmetry in Winged Makeup
Start with a light hand. Use a pencil or gel to sketch the outline on both sides before committing with liquid. This helps in adjusting any uneven lines easily.
Use tape or a business card as a guide. Place it at an angle from the outer corner of the lower lash line towards the brow. This serves as a ruler for your flick.
Always check your work from a distance. Step back and look in a mirror to assess the overall symmetry. Sometimes, a close-up view can be misleading.
Invest in a reliable mirror. A two-sided one with magnification can help you spot asymmetries that might be missed with a regular mirror.
Practice makes perfect. Spend time refining your technique on practice days. The more you work on it, the easier it becomes to achieve balance.
Use a q-tip or cotton swab dipped in makeup remover for clean-up. This can fix any mistakes without ruining the surrounding makeup.
Consider the shape of your lids. Different eye shapes require different approaches for symmetry. Tailor your technique to fit your unique features.
Lastly, don’t stress over minor imperfections. Sometimes, the charm lies in slight variations. Enjoy the process and have fun with it!
Common Mistakes to Avoid When Creating Feline-Inspired Looks
Skipping the primer can lead to smudging. Always apply a base to ensure longevity and clarity of the design.
Using the wrong formula may cause uneven application. Gel or liquid types offer different finishes; choose one that suits your skill level.
Neglecting the shape of my face can result in unbalanced features. Tailor the flick to complement your natural contours.
Overloading on product can make lines look thick and harsh. Build up gradually for precision and control.
Failing to practice can hinder progress. Spend time refining techniques before applying them for special occasions.
Ignoring the importance of tools can compromise the outcome. Invest in quality brushes and applicators for better results.
Disregarding eye shape leads to unsatisfactory results. Cater the wing design to enhance rather than overwhelm.
Forgetting to check for symmetry often results in uneven results. Use a mirror to assess both sides during the process.
Video:
To achieve that striking, feline-inspired look, begin with a quality liquid or gel product that glides smoothly across your lids. The right tool can make all the difference; a fine-tipped brush or a felt-tip applicator offers precision for those sharp lines you want.
Position yourself in front of a well-lit mirror, ensuring the area is bright enough to see every detail. Start at the inner corner of your lid, applying a thin line along the lash line. Gradually thicken the line as you move outward, angling it slightly upward towards the outer edge. This upward flick is key to creating that alluring lift.
Once the base is laid down, it’s time for the flick. Visualize a line extending from your lower lash line; this will guide your upward stroke. Keep it subtle and angled for a natural yet striking effect. If you make a mistake, don’t worry–just use a cotton swab dipped in makeup remover to clean up any imperfections.
Finish with a coat of mascara to enhance your lashes, giving your look the final touch. This technique not only enhances your natural beauty but also brings out the playful spirit of a feline friend.
Creating a Striking Feline Look
To achieve that alluring feline appearance, begin with a well-defined line along the upper lash. Use a liquid or gel formula for precision. Start at the inner corner, gently flicking the applicator towards the outer edge. Aim for a slight upward angle at the finish to mimic the natural lift of a cat’s features.
Add Depth with a Wing
Once the initial line is established, extend it outward to form a wing. This section should be thicker than the base line, tapering as it moves towards the tip. For a seamless transition, smudge lightly with a brush or your fingertip for a softer effect. Ensure both sides are symmetrical by checking in a mirror frequently.
<h3.Finish with a Pop of Color
For an extra dimension, consider applying a complementary shade on the lower lash line. A subtle hue can enhance the overall look, making those peepers stand out. Don’t forget to curl your lashes and add mascara for a finishing touch, amplifying the dramatic effect of this makeup style.
Choosing the Right Eyeliner for Cat Eyes
For achieving that perfect look, I recommend liquid formulas. They offer precision and a sleek finish. Gel variants are another great option, providing a smooth glide while allowing for easy blending.
Consider the brush type; a fine-tipped applicator is ideal for sharp lines. If you prefer a softer appearance, a pencil can create a more natural effect. Waterproof options are fantastic for longevity, ensuring your masterpiece stays intact throughout the day.
Color choice plays a significant role as well. Classic black is timeless, but experimenting with dark greens or browns can add depth. Don’t shy away from metallics for a touch of glamour.
Always test the product on your skin before committing. This way, you can find the perfect match for your unique fur and skin tone. Remember, the right tools will make all the difference in your artistic endeavors!
Step-by-Step Guide to Creating the Perfect Wing
Begin with a clean and primed eyelid to ensure longevity. Choose a gel or liquid formulation for precision. Start at the inner corner and draw a thin line along the lash line, gradually thickening it as you reach the outer corner.
Creating the Wing
To form the wing, imagine a line extending from the lower lash line towards the end of your eyebrow. Use this as a guide. From the outer corner, flick the applicator upward to create the desired angle. Connect this flick back to the lash line, filling in any gaps for a seamless look. Adjust the thickness to match your preference.
Final Touches
Once satisfied with the shape, make sure both sides are symmetrical. For a clean finish, use a cotton swab dipped in makeup remover to tidy up any mistakes. Don’t forget to check for any irritation, especially if you’re curious about what products are safe around pets, like are mothballs toxic to cats.
Tips for Achieving Symmetry in Winged Makeup
Start with a light hand. Use a pencil or gel to sketch the outline on both sides before committing with liquid. This helps in adjusting any uneven lines easily.
Use tape or a business card as a guide. Place it at an angle from the outer corner of the lower lash line towards the brow. This serves as a ruler for your flick.
Always check your work from a distance. Step back and look in a mirror to assess the overall symmetry. Sometimes, a close-up view can be misleading.
Invest in a reliable mirror. A two-sided one with magnification can help you spot asymmetries that might be missed with a regular mirror.
Practice makes perfect. Spend time refining your technique on practice days. The more you work on it, the easier it becomes to achieve balance.
Use a q-tip or cotton swab dipped in makeup remover for clean-up. This can fix any mistakes without ruining the surrounding makeup.
Consider the shape of your lids. Different eye shapes require different approaches for symmetry. Tailor your technique to fit your unique features.
Lastly, don’t stress over minor imperfections. Sometimes, the charm lies in slight variations. Enjoy the process and have fun with it!
Common Mistakes to Avoid When Creating Feline-Inspired Looks
Skipping the primer can lead to smudging. Always apply a base to ensure longevity and clarity of the design.
Using the wrong formula may cause uneven application. Gel or liquid types offer different finishes; choose one that suits your skill level.
Neglecting the shape of my face can result in unbalanced features. Tailor the flick to complement your natural contours.
Overloading on product can make lines look thick and harsh. Build up gradually for precision and control.
Failing to practice can hinder progress. Spend time refining techniques before applying them for special occasions.
Ignoring the importance of tools can compromise the outcome. Invest in quality brushes and applicators for better results.
Disregarding eye shape leads to unsatisfactory results. Cater the wing design to enhance rather than overwhelm.
Forgetting to check for symmetry often results in uneven results. Use a mirror to assess both sides during the process.


