

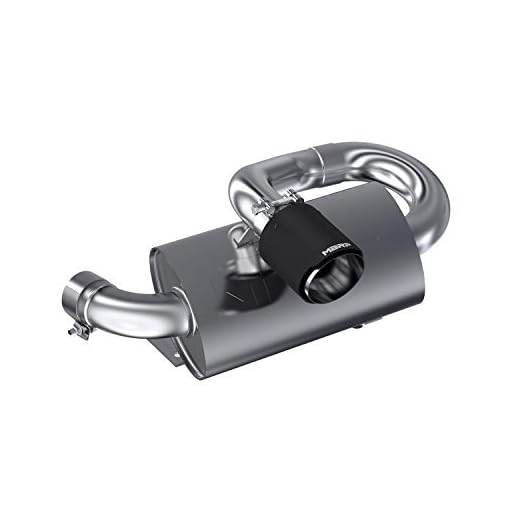
For anyone looking to enhance the performance of their Can-Am X3, removing the factory-installed exhaust component can yield significant gains. It’s a straightforward modification that can lead to improved airflow and a more aggressive sound profile.
When considering this upgrade, it’s crucial to select a high-performance replacement that complements your vehicle’s setup. Look for options that maximize exhaust flow while minimizing back pressure, which can help unleash the full potential of your engine.
Additionally, make sure to check local regulations regarding exhaust modifications to ensure compliance. Some regions have strict noise ordinances, so it’s wise to choose a system that balances performance with legal requirements.
As an 8-year-old Scottish Fold who knows a thing or two about getting things done efficiently, I recommend researching various brands and user reviews before making a purchase. This way, you can find a system that not only fits your X3 but also aligns with your performance goals.
Can Am X3 Exhaust Modification
For those looking to enhance performance, swapping out the factory exhaust for a more efficient system is a solid choice. An aftermarket option can significantly improve airflow, leading to better throttle response and increased horsepower.
Benefits of Upgrading the Exhaust
- Enhanced sound, giving your ride a more aggressive tone.
- Weight reduction, contributing to improved handling.
- Increased power output, making climbs and acceleration smoother.
Installation Tips
Before you start, ensure you have the right tools and components. Here are some steps I recommend:
- Gather necessary tools: wrenches, sockets, and a torque wrench.
- Lift the vehicle securely to access the exhaust area.
- Remove the old exhaust carefully, taking note of each connection point.
- Install the new system following the manufacturer’s instructions.
After installation, it’s essential to monitor performance. If you notice any unusual sounds or decreases in power, double-check the connections. For those curious about pet nutrition, check out does jinx make cat food or explore the best treatment for hairballs in cats.
Benefits of Installing a Cat Delete Pipe on Can Am X3
Upgrading the exhaust system on your vehicle enhances performance significantly. A high-performance exhaust system reduces back pressure, allowing the engine to breathe better. This leads to improved horsepower and torque, making your rides more exhilarating.
Installing a replacement exhaust component also contributes to weight reduction. Many factory systems are heavier due to additional components designed to meet emissions regulations. A lighter setup enhances acceleration and overall handling, which is crucial during off-road adventures.
Sound enhancement is another key benefit. By opting for a more open exhaust route, the engine produces a throatier, more aggressive sound that many enthusiasts appreciate. This auditory upgrade can elevate the driving experience, making every ride feel more engaging.
Another advantage is ease of maintenance. Aftermarket exhaust systems are often designed for straightforward installation and maintenance. This can save you time and effort compared to stock systems that may require more frequent checks and potential repairs.
Finally, customizing your vehicle’s exhaust setup can improve aesthetics. Many aftermarket systems feature sleek designs that enhance the overall look of your machine, allowing you to showcase your personal style.
Step-by-Step Guide to Installing a Cat Delete Pipe on Can Am X3
Gather all necessary tools: a socket set, torque wrench, and safety goggles. Ensure the vehicle is on a flat surface and the ignition is off.
1. Begin by lifting the vehicle using jack stands to access the underside safely.
2. Locate the existing exhaust system. Remove the screws securing it in place using the socket set.
3. Disconnect the exhaust from the mounting points. Be cautious of any hot areas if the engine was recently running.
4. Take the replacement exhaust section and align it with the existing mounting points. Ensure a snug fit for optimal performance.
5. Secure the new assembly in place with the provided clamps or bolts. Follow the manufacturer’s torque specifications for tightening.
6. Reconnect any sensors or components that were previously detached during removal.
7. Double-check all connections for tightness and ensure no parts are left loose.
8. Lower the vehicle back to the ground. Start the engine and listen for any unusual sounds, indicating a potential issue.
9. Take a test drive to ensure everything is functioning as expected and check for leaks.
10. Regularly inspect the installation for any signs of wear or looseness in the future.
Video:
For anyone looking to enhance the performance of their Can-Am X3, removing the factory-installed exhaust component can yield significant gains. It’s a straightforward modification that can lead to improved airflow and a more aggressive sound profile.
When considering this upgrade, it’s crucial to select a high-performance replacement that complements your vehicle’s setup. Look for options that maximize exhaust flow while minimizing back pressure, which can help unleash the full potential of your engine.
Additionally, make sure to check local regulations regarding exhaust modifications to ensure compliance. Some regions have strict noise ordinances, so it’s wise to choose a system that balances performance with legal requirements.
As an 8-year-old Scottish Fold who knows a thing or two about getting things done efficiently, I recommend researching various brands and user reviews before making a purchase. This way, you can find a system that not only fits your X3 but also aligns with your performance goals.
Can Am X3 Exhaust Modification
For those looking to enhance performance, swapping out the factory exhaust for a more efficient system is a solid choice. An aftermarket option can significantly improve airflow, leading to better throttle response and increased horsepower.
Benefits of Upgrading the Exhaust
- Enhanced sound, giving your ride a more aggressive tone.
- Weight reduction, contributing to improved handling.
- Increased power output, making climbs and acceleration smoother.
Installation Tips
Before you start, ensure you have the right tools and components. Here are some steps I recommend:
- Gather necessary tools: wrenches, sockets, and a torque wrench.
- Lift the vehicle securely to access the exhaust area.
- Remove the old exhaust carefully, taking note of each connection point.
- Install the new system following the manufacturer’s instructions.
After installation, it’s essential to monitor performance. If you notice any unusual sounds or decreases in power, double-check the connections. For those curious about pet nutrition, check out does jinx make cat food or explore the best treatment for hairballs in cats.
Benefits of Installing a Cat Delete Pipe on Can Am X3
Upgrading the exhaust system on your vehicle enhances performance significantly. A high-performance exhaust system reduces back pressure, allowing the engine to breathe better. This leads to improved horsepower and torque, making your rides more exhilarating.
Installing a replacement exhaust component also contributes to weight reduction. Many factory systems are heavier due to additional components designed to meet emissions regulations. A lighter setup enhances acceleration and overall handling, which is crucial during off-road adventures.
Sound enhancement is another key benefit. By opting for a more open exhaust route, the engine produces a throatier, more aggressive sound that many enthusiasts appreciate. This auditory upgrade can elevate the driving experience, making every ride feel more engaging.
Another advantage is ease of maintenance. Aftermarket exhaust systems are often designed for straightforward installation and maintenance. This can save you time and effort compared to stock systems that may require more frequent checks and potential repairs.
Finally, customizing your vehicle’s exhaust setup can improve aesthetics. Many aftermarket systems feature sleek designs that enhance the overall look of your machine, allowing you to showcase your personal style.
Step-by-Step Guide to Installing a Cat Delete Pipe on Can Am X3
Gather all necessary tools: a socket set, torque wrench, and safety goggles. Ensure the vehicle is on a flat surface and the ignition is off.
1. Begin by lifting the vehicle using jack stands to access the underside safely.
2. Locate the existing exhaust system. Remove the screws securing it in place using the socket set.
3. Disconnect the exhaust from the mounting points. Be cautious of any hot areas if the engine was recently running.
4. Take the replacement exhaust section and align it with the existing mounting points. Ensure a snug fit for optimal performance.
5. Secure the new assembly in place with the provided clamps or bolts. Follow the manufacturer’s torque specifications for tightening.
6. Reconnect any sensors or components that were previously detached during removal.
7. Double-check all connections for tightness and ensure no parts are left loose.
8. Lower the vehicle back to the ground. Start the engine and listen for any unusual sounds, indicating a potential issue.
9. Take a test drive to ensure everything is functioning as expected and check for leaks.
10. Regularly inspect the installation for any signs of wear or looseness in the future.


